How to Effortlessly Record and Add voiceovers to your Powerpoint Presentation?

PowerPoint decks have been a staple in business, education, and beyond. From documenting marketing plans to delivering training modules, these presentations have become a go-to tool.
That’s where voiceovers come in. Adding voiceovers to your slides can turn a static presentation into a dynamic, engaging experience that enhances understanding and accessibility for your audience. Despite their benefits, voiceovers in PowerPoint also present challenges. Users often struggle with syncing audio to animations or face issues with file size and compatibility. Moreover, adding a monotonous voiceover can result in disengagement, with studies showing that 37% of virtual viewers lose focus within 10 minutes if audio lacks dynamism, according to a 2023 Microsoft study.
When using a tool to record narration, there are some challenges in adding audio or when trying to sync slide timings. Which leads us to the premise of this blog article: How can you effectively integrate voiceovers into PowerPoint presentations to elevate your storytelling?

Table of Contents
How to Record Voiceover in PowerPoint?
There are two ways to incorporate voiceovers into your slides: using Microsoft Office’s built-in recorder or leveraging a more advanced tool like Murf AI’s text to speech platform.
So which tool is the best with regard to voice selection, ease-of-use, pricing and additional features? We discussed both here:
Microsoft Office's Built-In Recorder
🤔Initial thoughts: Good for basic presentations, difficult to customise, hard to navigate.
Let’s take a look at Microsoft Office’s own built-in audio recorder
You can either upload an existing recording from your PC/ hard drive or record a new voiceover for your PowerPoint presentation. Here is a step-by-step guide to adding and recording audio to your slides, such as music, narration, or sound bites.
To add an existing audio file from your PC:

Open the slide you want to add audio to, select 'Insert,' and then 'Audio' from the menu.
Next, choose the 'audio on my PC' option to select the audio file you want, add it to the 'insert audio' dialog box, and confirm 'insert.'
To begin recording new audio for your presentation, open your slide, select 'Insert' > 'Audio,' and choose 'Record Audio.'
When you’re happy with your narration, click ‘OK’
Select and drag the audio clip where you want it on the slide.
You need to have your microphone enabled in order to record voice overs.

With Microsoft Office, you can do a little bit of customization- but it’s not as efficient as other tools with the amount of control that you have.
With PPT voiceover on Microsoft Office, here are some of the customization options that are available to use:

Add Murf’s Recorded Audio to your presentation
🤔Initial thoughts: Great customization options, realistic voices, simple and quick to use.
For a professional touch, consider using Murf Studio. Convert your slides into images, upload them into Murf, and create your script. You can select from 120+ voices to match your presentation's tone, and sync the voiceover with your slide and animation timings. Using Murf Studio's text to speech, you can add natural-sounding voiceovers to your PowerPoint slides.
This approach makes it easy to add a voiceover to PowerPoint and offers flexibility for future edits. Before you start recording, here’s a few things that you need to consider:
Creating Images from Slides
Preparing a Script
Also read : Create Engaging Voicemail Voice Over Greetings with AI
Converting Slides to Images - for easier voiceover creation!
Since Murf Studio doesn't support .pptx, .ppsx, or .odp file formats, it's key to convert your presentation slide deck to image format.

To do so, open your presentation in PowerPoint and go to File, and choose 'Export.'
Next, select JPEG or PNG in File Format and select 'Save Every Slide Option' and Export.
Once you Export, a folder will be created on your system with all the Slide Images numbered.
Preparing a Script - Keeping your content ready!
When it comes to creating the script for your slide show presentation, remember these: make every word count, check grammar and pronunciation, add proper pronunciations, use simple short sentences and keep the tone of voice consistent throughout the presentation.
To keep things simple, whether it is a single slide or multiple slides or for your entire presentation, you will need to create a well-catered script to easily navigate through this plug-in.
Create Professionally Narrated Powerpoint Presentations - Start Recording today!
With these two elements in mind, let’s now take a look at the quick step-by-step guide to adding voiceover to your presentation with Murf Studio:
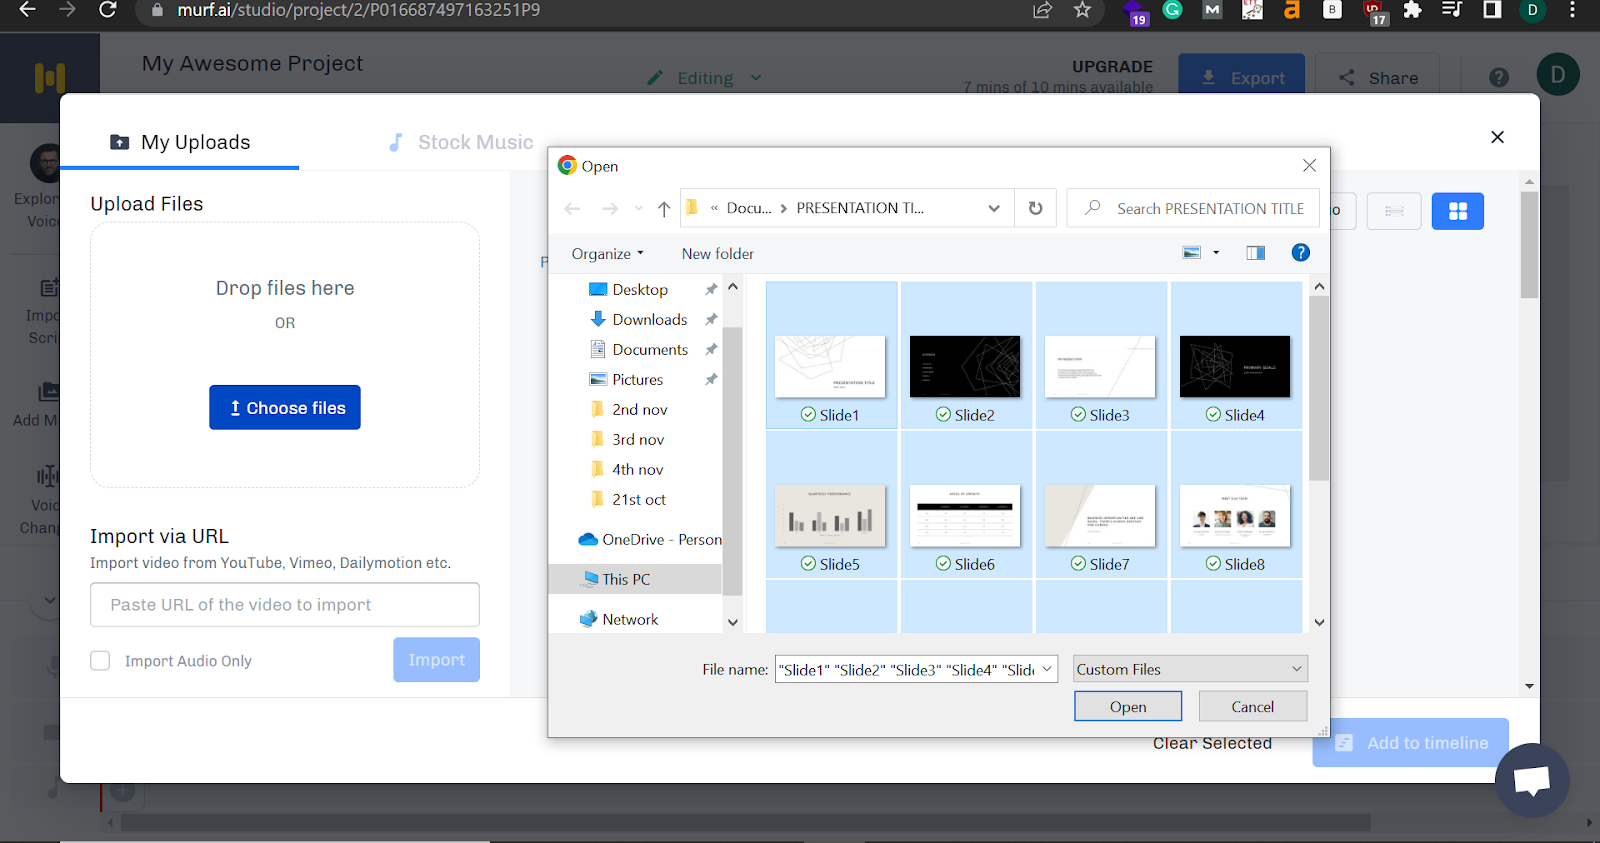
Create a new project and upload all your slide images in JPEG or PNG formats.
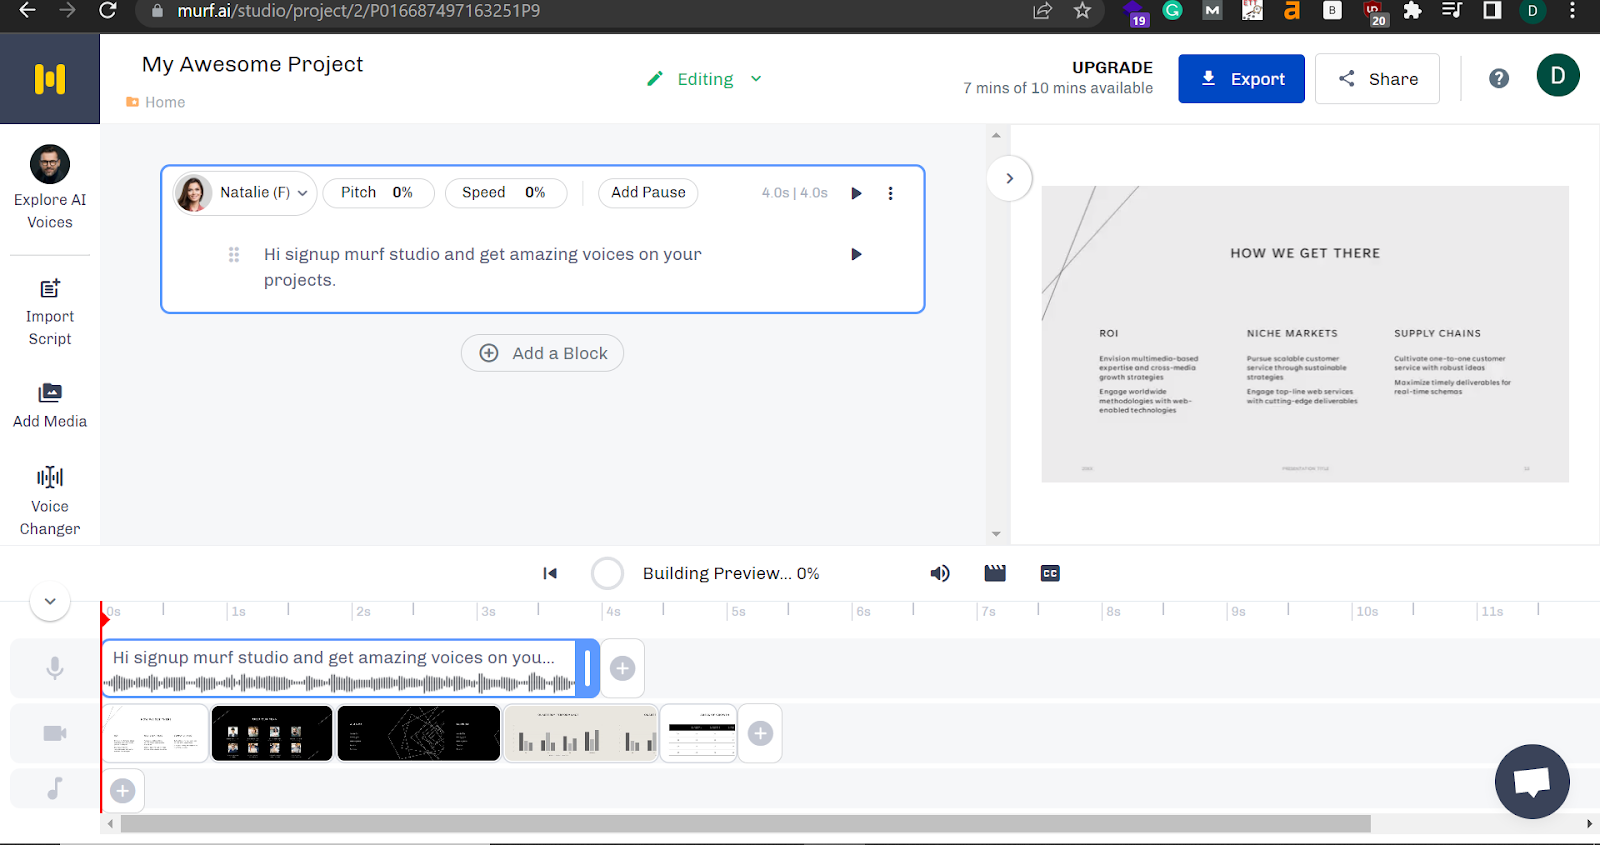
Enter or copy-paste your voiceover script. We recommended creating a new text/audio block for every slide so that you can easily adjust the timing of the audio blocks with the text.
Choose your choice of AI voice from Murf's library of 120+ realistic text to speech voices, depending on the gender, age, language and accent your PPT demands and render.
Once your voiceover is rendered, adjust the narration and the audio block timing with the slide show timing and sync them together.

You can easily add and sync background music or sound clips to your voiceover by selecting from Murf's royalty-free music collection, adjusting it to specific slides by resizing the background music blocks. You can even add your own voice with Murf AI!.
Once the powerpoint recording is finalized and you have adjusted the timing of audio with the slides, it's time to render the presentation in a video format. Murf also lets you choose the audio channel type (mono or stereo) before rendering.
And you are done! Your voiceover PowerPoint presentation is now ready for preview. You can play the video to check the timing of slides along with the voice over and make changes if needed.
If you wish to change any part of the script, follow these steps:
Edit Text -> Render Audio button -> Adjust Slide and Audio Block Size -> Build Video. Once done, you can export your voice over presentation in an MP4 format.

Syncing Murf Voiceover to your powerpoint slides
Another way to add Murf voice overs to PowerPoint presentation is to first export or download the audio to your PC and then upload it to the animation.
Step 1: Click on the insert tab on your PPT, and navigate to the 'audio' icon and click the 'Audio on my PC' option to add the Murf voiceover to your PPT.
Step 2: View it in the animation pane. Move it to the top of the list.
Step 3: Determine the timing of the animation objects and the audio and modify accordingly by changing the start time and delay. When you are done, you audio and animations will sync perfectly.
Alternatively, you can also use the 'Use Timings' option. When 'Use Timings' box is checked, animations will play automatically on time and stay in sync with sound. If animations have to be changed manually, you simply have to turn 'Use Timings' off.
Also read : Elearning voice overs: everything you need to know
Why Choose Murf over Microsoft's In-Built Audio Recorder?
Save Time & Money:
With Murf, you can upload a script, pick an on-brand AI voice, and get a professional voice overs in minutes. No more scheduling or hiring voice actors, rehearsing, or editing. It’s fast, cost-effective, and hassle-free.
Easy Edits - for your audio file
Need to change a script? Just update the text, and Murf automatically adjusts the voiceover no need to redo the recording, reschedule, or hire anyone again. You can make quick edits anytime.
Clear & Customizable Voiceovers:
Murf removes background noise and lets you fine-tune the voiceover with options like pitch, speed, and emphasis. Get clear, polished results without needing extra equipment or software.
Variety of Voices:
Choose from over 120 natural-sounding AI voices across 20 languages. Whether it’s for corporate training or educational content, Murf has a voice for every need.
To Sum Things Up - Which tool to pick for your powerpoint presentation?
Including engaging voiceovers in PowerPoint presentations not only adds a definite 'wow' factor to your presentations, making them more appealing to your audience but also enhances the quality of a purely visual medium by increasing viewer interest, understanding, and retention through the power of voice. And, Murf is here to help make voiceovers easy with customised AI voices and tools to optimise your workflow.
Why use any other third party software to record slide show when you have Murf to create the perfect powerpoint voice audio recordings? Your presentation file just got more easy to add engaging voice overs.
Ready to nail your presentation? All it takes is a few clicks!

FAQs
How to Add An Audio file to PowerPoint:
Convert your presentation to images, import them to Murf Studio, and add your script. Choose an AI voice, sync the audio with slide show timings, and you're set! Simply record audio and get started!
How to Add Music to PowerPoint Slides:
In Murf, click 'Add media' to select background music or upload your own. Adjust the timing of the music block to match your presentation. Done!
To record slide show in my presentation file, can I add a recorded narration?
Yes! In your powerpoint file, you can add your own audio recording narration or use from a selection of 120+ AI voices available for you. Or add audio files and get them changed to the voice you prefer!