


Get in touch
Discover how we can improve your content production and help you save costs. A member of our team will reach out soon

Everybody uses the Powerpoint presentation tool. It's an amazing platform to display visual slideshows where you can design, create and edit slides ready for export that is typically used in educational, business, or even personal presentations. Circle back and think of the best presentations you've had for your office, or even when a friend is presenting an idea on where to go for your next travel adventure!
The visual element is certainly checked. But what about the audio recording? How can you record audio narration for your ppt file and add slide transitions and would really make your final video slide really stand out?
In this article, we will discuss about how you can add a record audio or an audio narration in your powerpoint slides. We will also look at the steps involved to create your very own audio recordings, ready for export and inserted into your powerpoint slide. Let's begin!
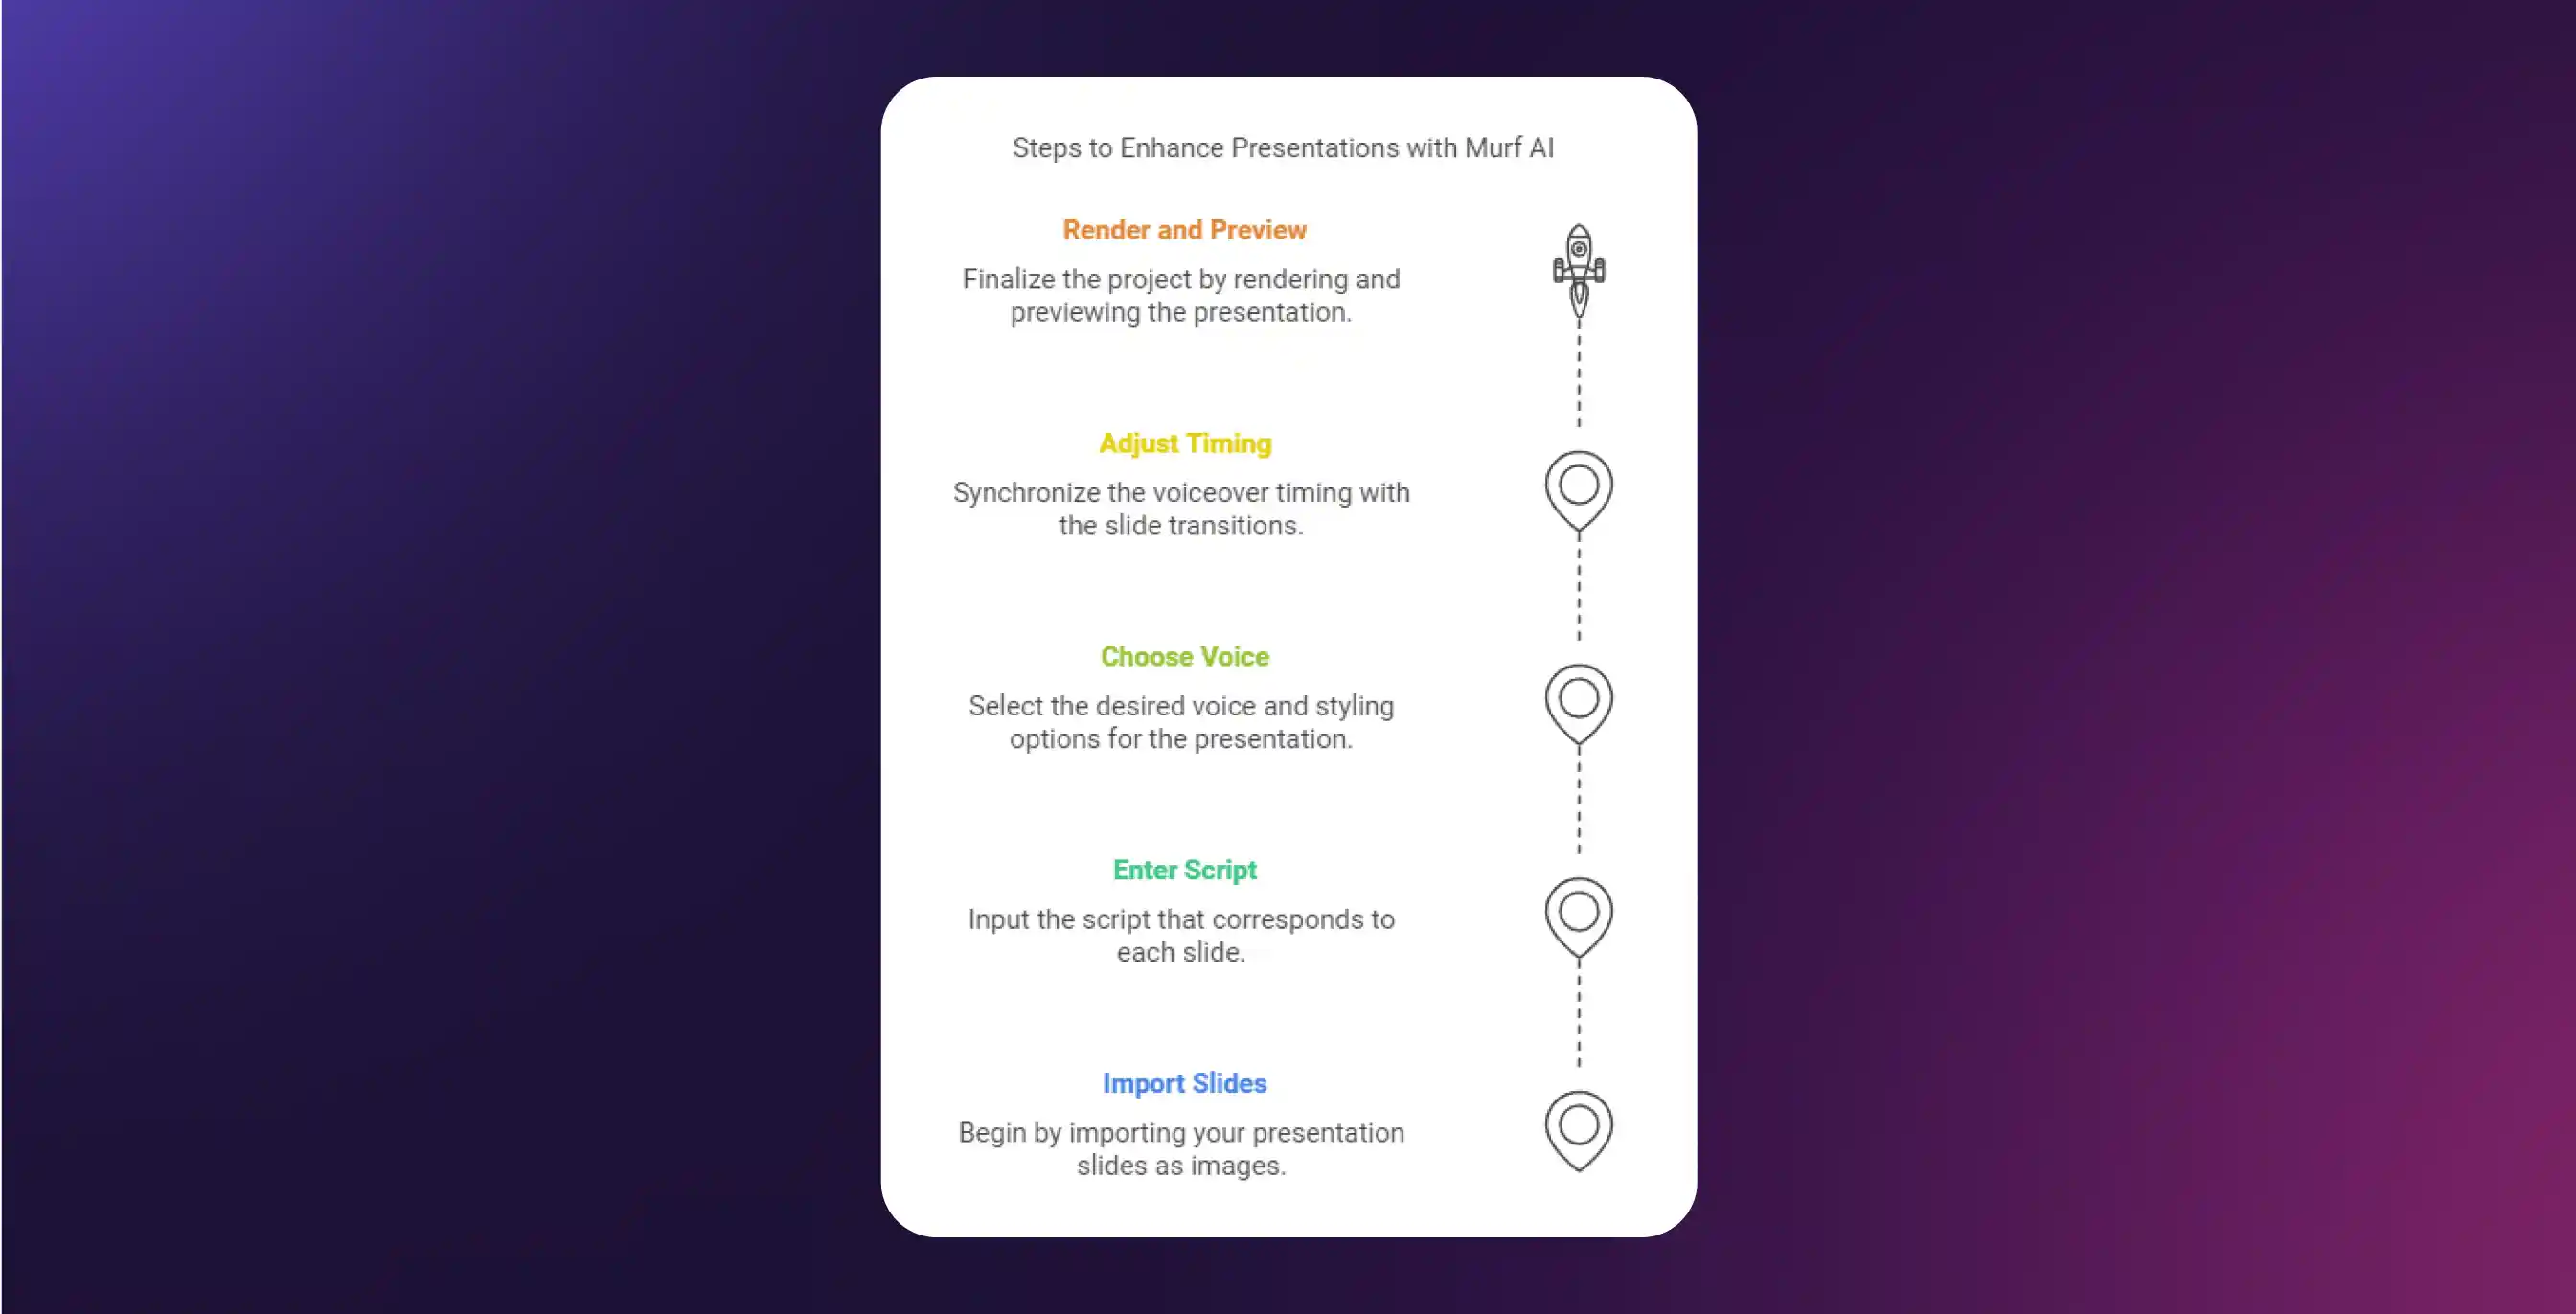
There are two ways you can go about this. The first (faster) method is using the Murf Studio that lets you add narration in PowerPoint using professional sounding voice overs. The second method is to record your narrations in PowerPoint using your own voice and then export that as a final video.
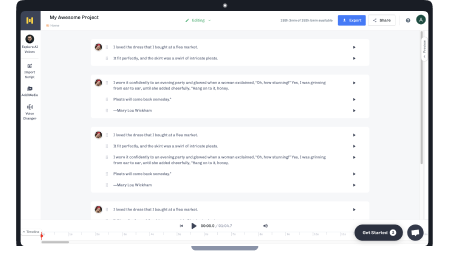
Murf Studio needs just 5 steps that can be done in minutes. Murf uses AI voice technology to offer a choice of 100% human-sounding professional voices that lets you save a lot of time and money in recording and editing voice overs. You don't need a microphone or any audio equipment for this.
It is especially useful if you want to create the voice over on PowerPoint in a different English accent than yours. Editing your scripts is much faster and simpler in this method as you do not need to re-record every time you decide to change something. Just edit your script and listen to the new version in seconds.
If you want to go for the simplest and fastest method, you can skip reading the rest of this article and just click on the link below for the easier version of this tutorial: How to add voiceover to PowerPoint using Murf.
And then we move on to the more conventional method of recorded audio for you ppt file. Recording your voice over for PowerPoint is a 10-step process that typically takes 30-60 mins to record and edit for a 15-20 slide presentation. This is a good choice for you if you want to record using your own voice specifically.
Note: You would need a good microphone and a sound-proof/silent room to get a clear recording and to achieve a professional quality of voice recording.
Here is a step-by-step guide to show you how to do this in PowerPoint:
Step 1: Get your PowerPoint presentation optimized for voice over
Before you start the voice over process, here is a checklist that will ensure your process is seamless later while you are creating your voice over. Is the length of the presentation optimal for your allotted time? Or, is it too long?
A good thumb rule to use is to budget 30-60 secs for each slide. E.g. if you have a 20 min slot, you would want to have 20-40 slides maximum. If you are explaining complex concepts in some slides, you may allot 2 mins of explanation per slide.
Is there a story flowing through your presentation? Are the slides in the right order? When you record a voice over, it should be somewhat like you are sharing a story with someone. But before you begin, make sure your PowerPoint content is optimized for it.
Too much text? Average words per slide should be around 40. If you have too much text in any of your slides, you can consider moving some of the explanation to the voice over script and only keep the concepts in the slides.
Step 2: Write the perfect voice over script
Now that your presentation is ready, it is time to create a script for recording a voice over. This step involves you thinking through the key concepts or takeaways that you would like to discuss with every slide. A good way to do that is to ask yourself one simple question, "what am I trying to say with this slide?" and just write down the answer to this question.
Once you have done this, it will become simpler for you to stay on-point as you try to perfect your script.
A few best practices to remember while creating your script are as follows:
A thumb-rule to follow here is 150-180 words per minute. So, if you want to spend a minute on each slide, keep it to under 180 words to avoid post-processing edits.
Say the important things first. Audiences tend to get distracted pretty easily, so it is a good practice to get to the point fast and then elaborate on it so that your message is not lost.
Check your grammar and punctuations. Punctuations can sometime completely change the meaning of a sentence when you are reading it aloud, so make sure your pauses and exclamations are in the right place before you start narrating.
Try to use short sentences to keep it conversational. Long sentences can sometimes be difficult to narrate effectively and can also be tough on the listener. So, it is a good idea to keep the sentences short and crisp, to the extent possible.
Step 3: Choose the right equipment for voice over
It is recommended to use a good quality external microphone for recording your voice overs in PowerPoint. This is because PowerPoint does not provide you many options to do audio narration post-processing like noise cancellation, threshold change, etc later on. Hence, it is important to make sure that you do not have background noise and your voice is clearly audible in the original recording. You can also use your laptop or computer microphone if it is a good one, but make sure not to record in a noisy environment.
Step 4: Set up your voice over microphone
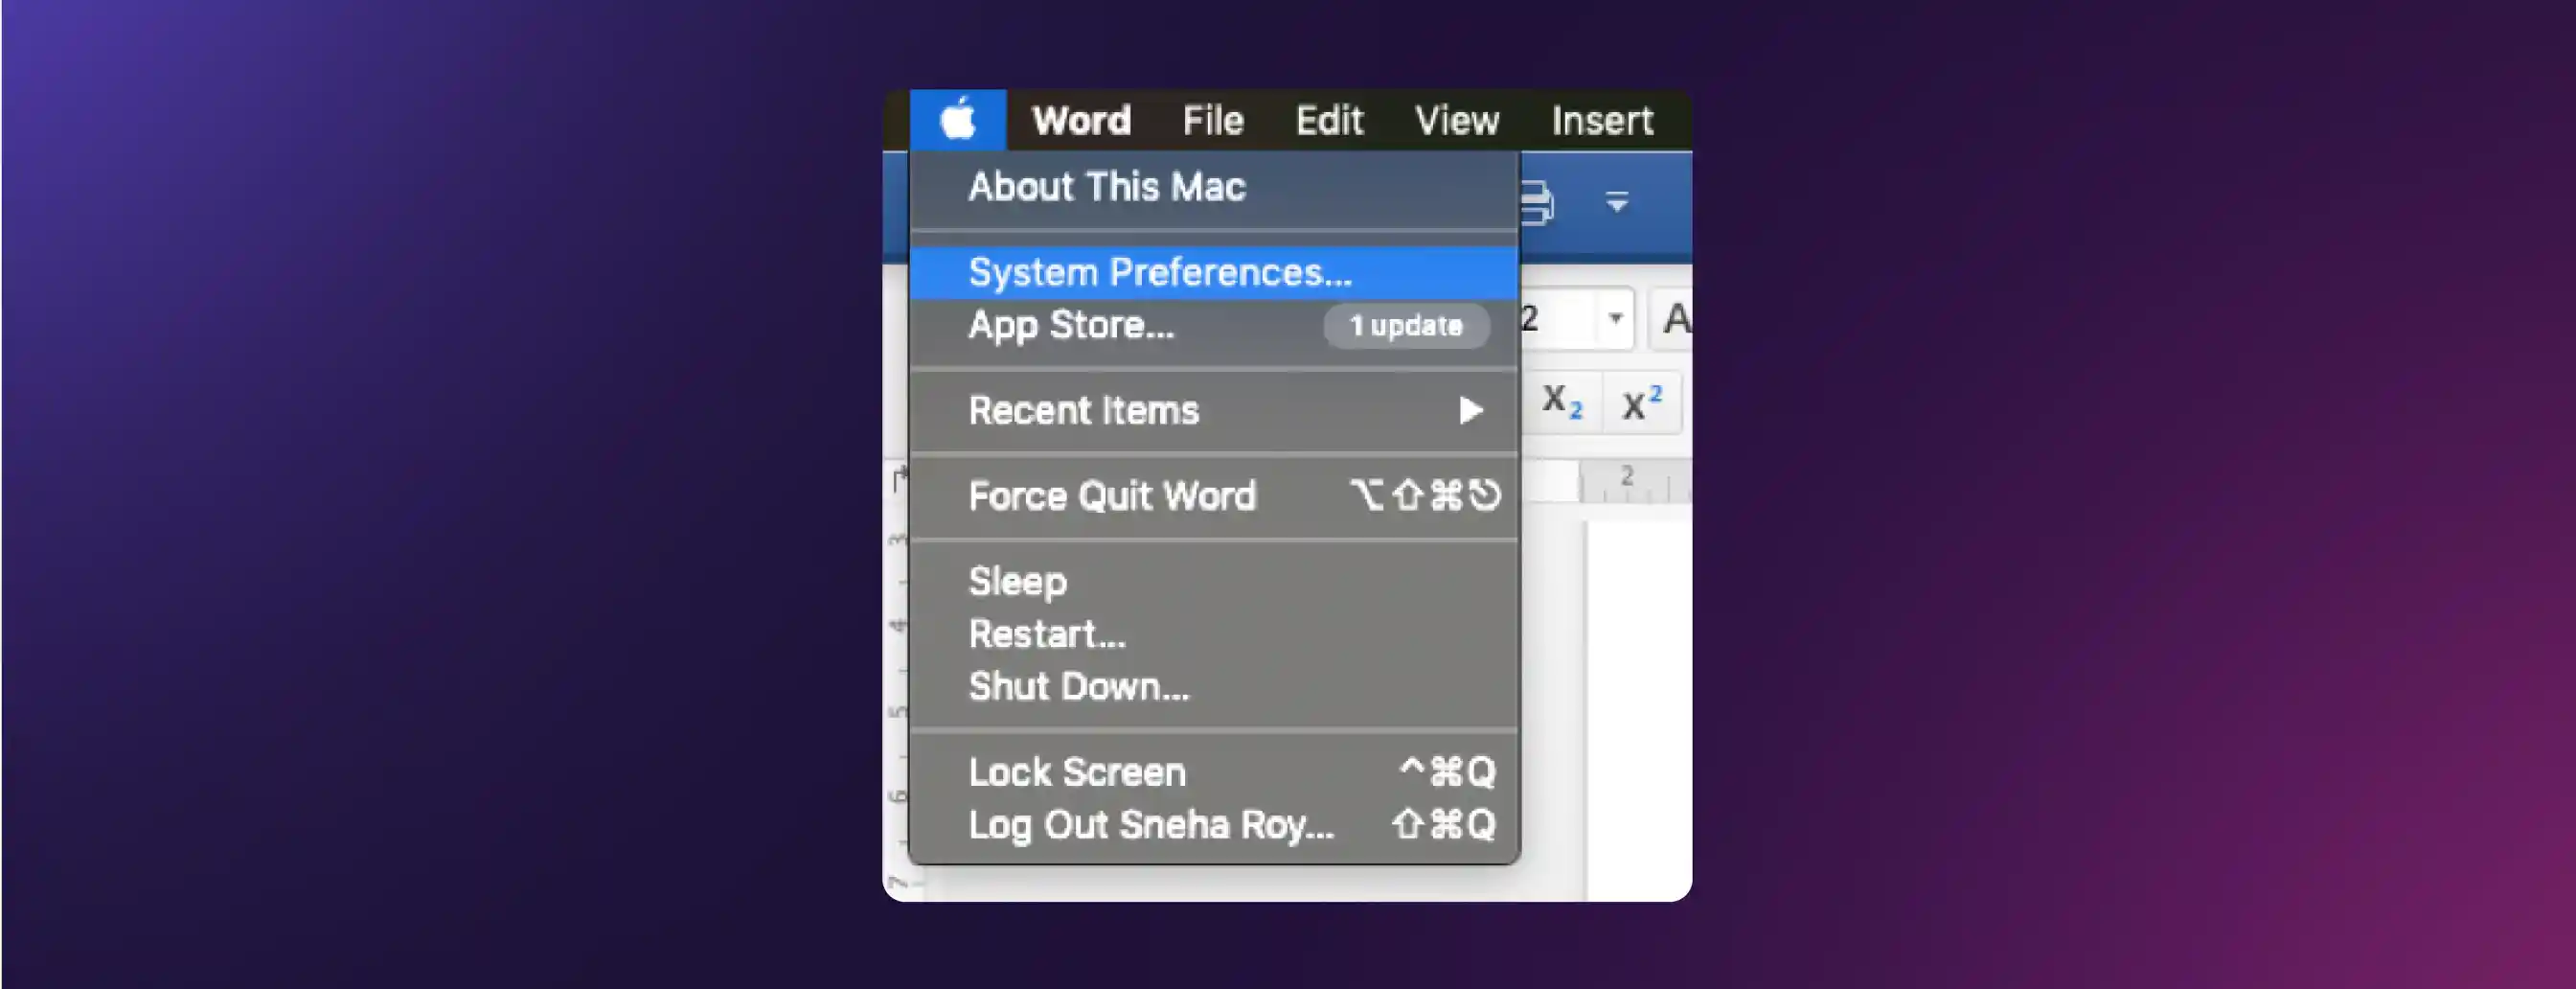
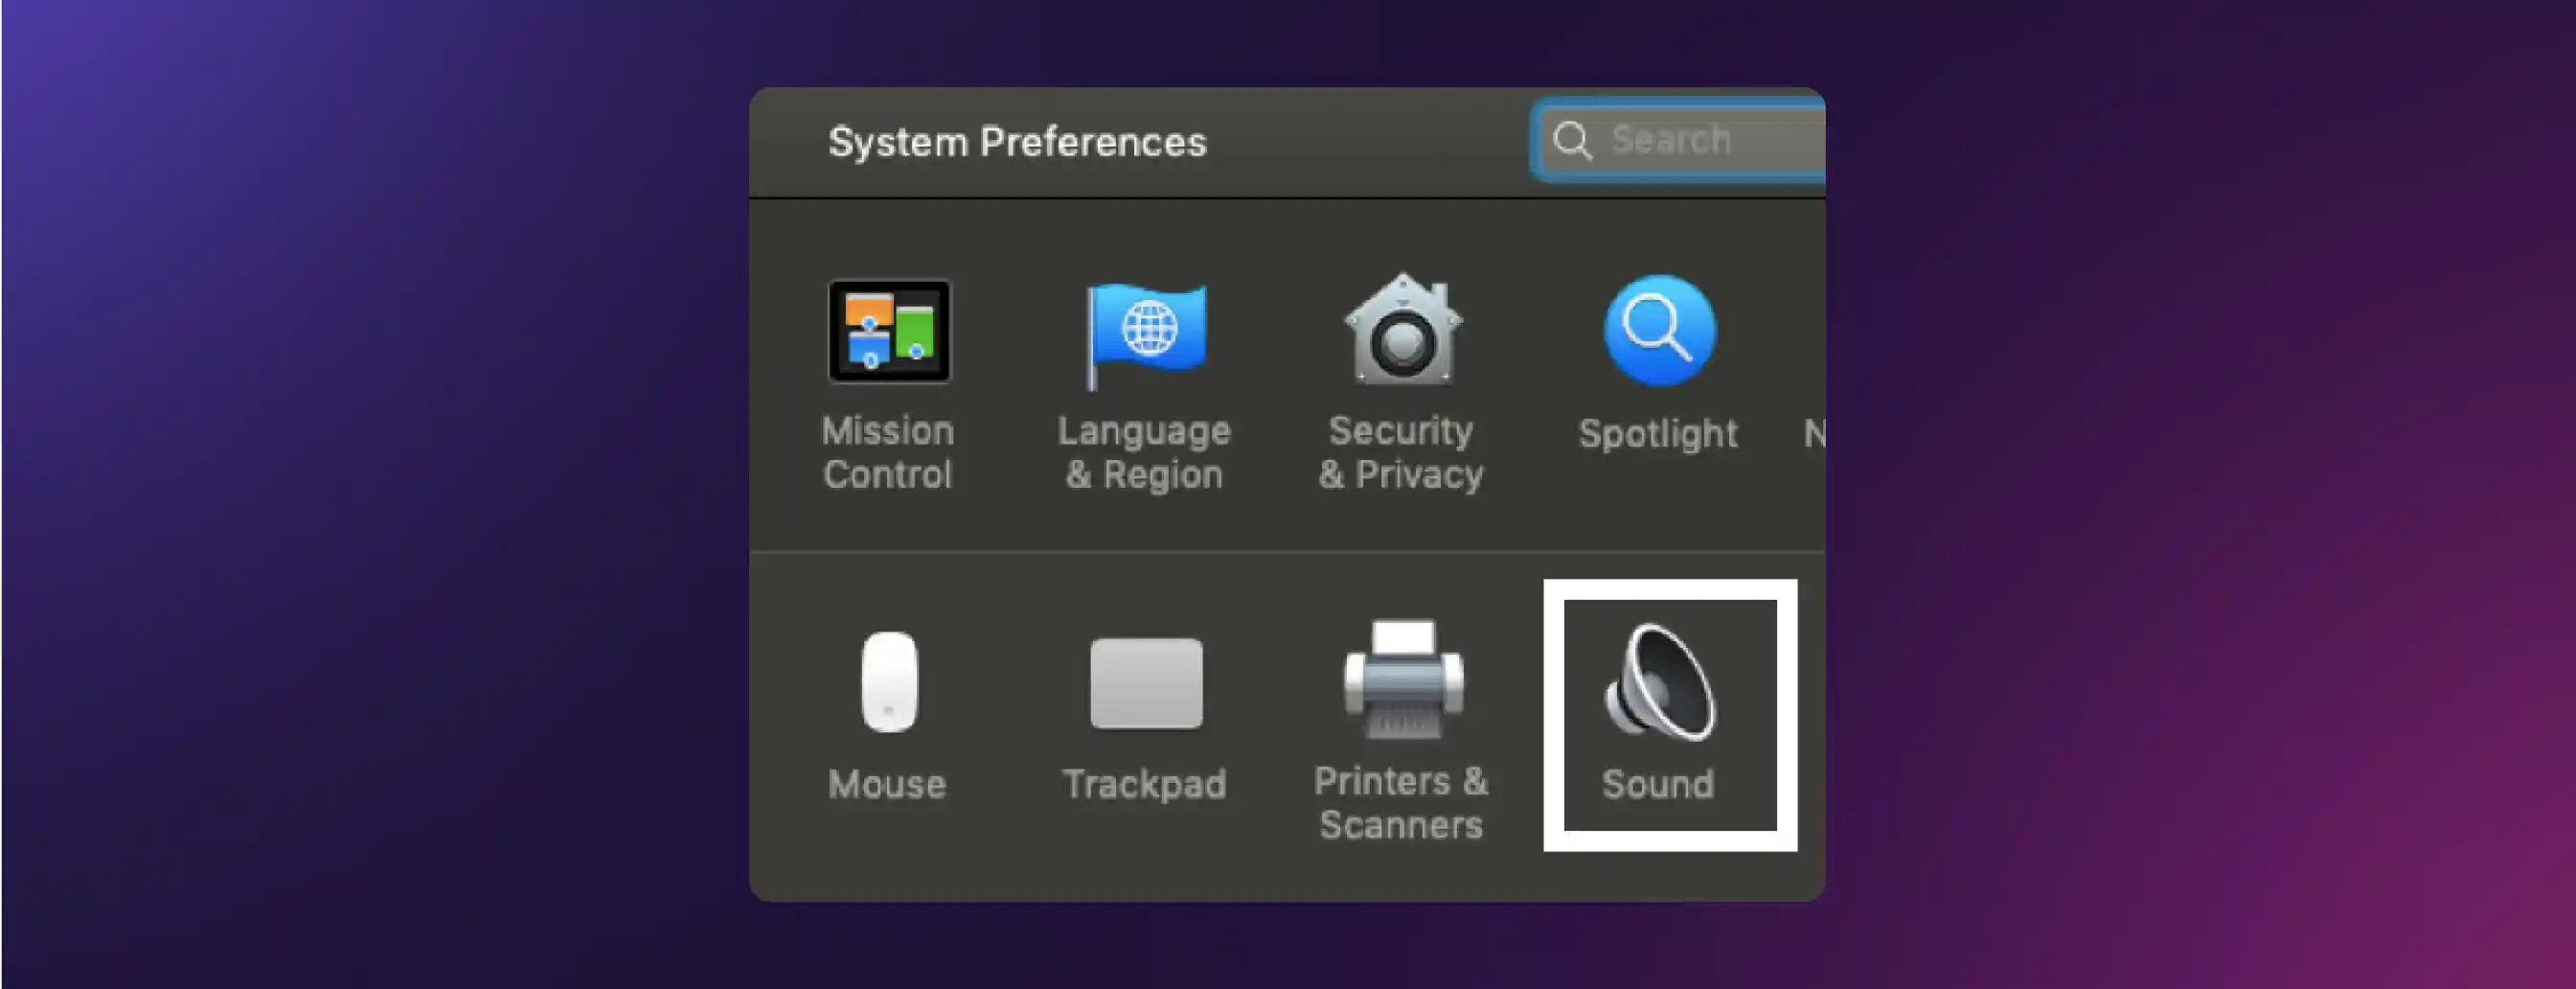
For Mac users, go to the Mac button on top left and select System Preferences, then select Sound.
Once you select Sound, you can see all the microphone connected to your computer, including the internal microphone as in my mac shown below.
Check if your PowerPoint software has access to your microphone. This is important, otherwise your audio narration will not be recorded.
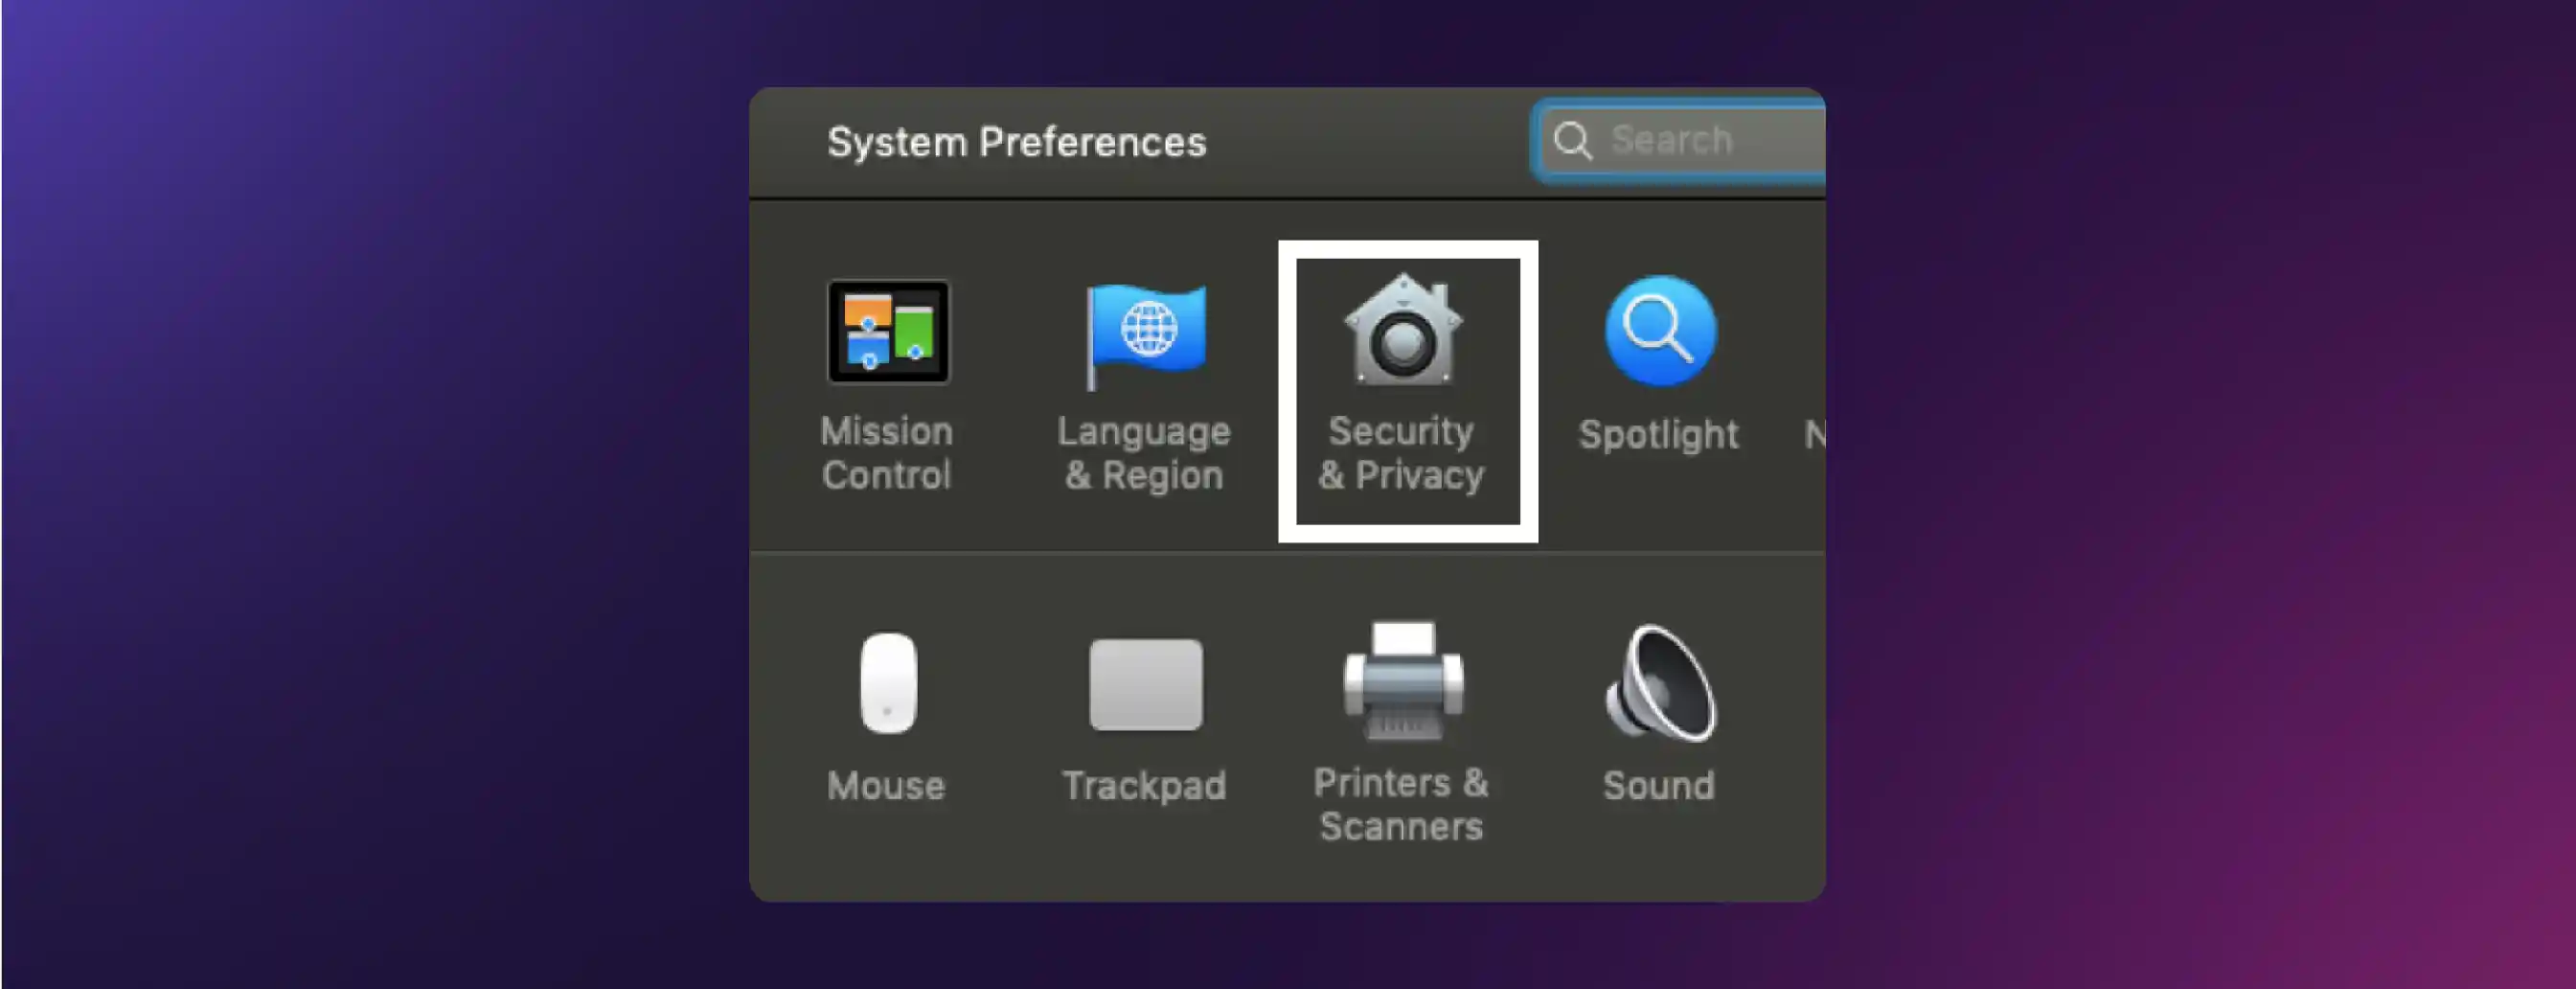
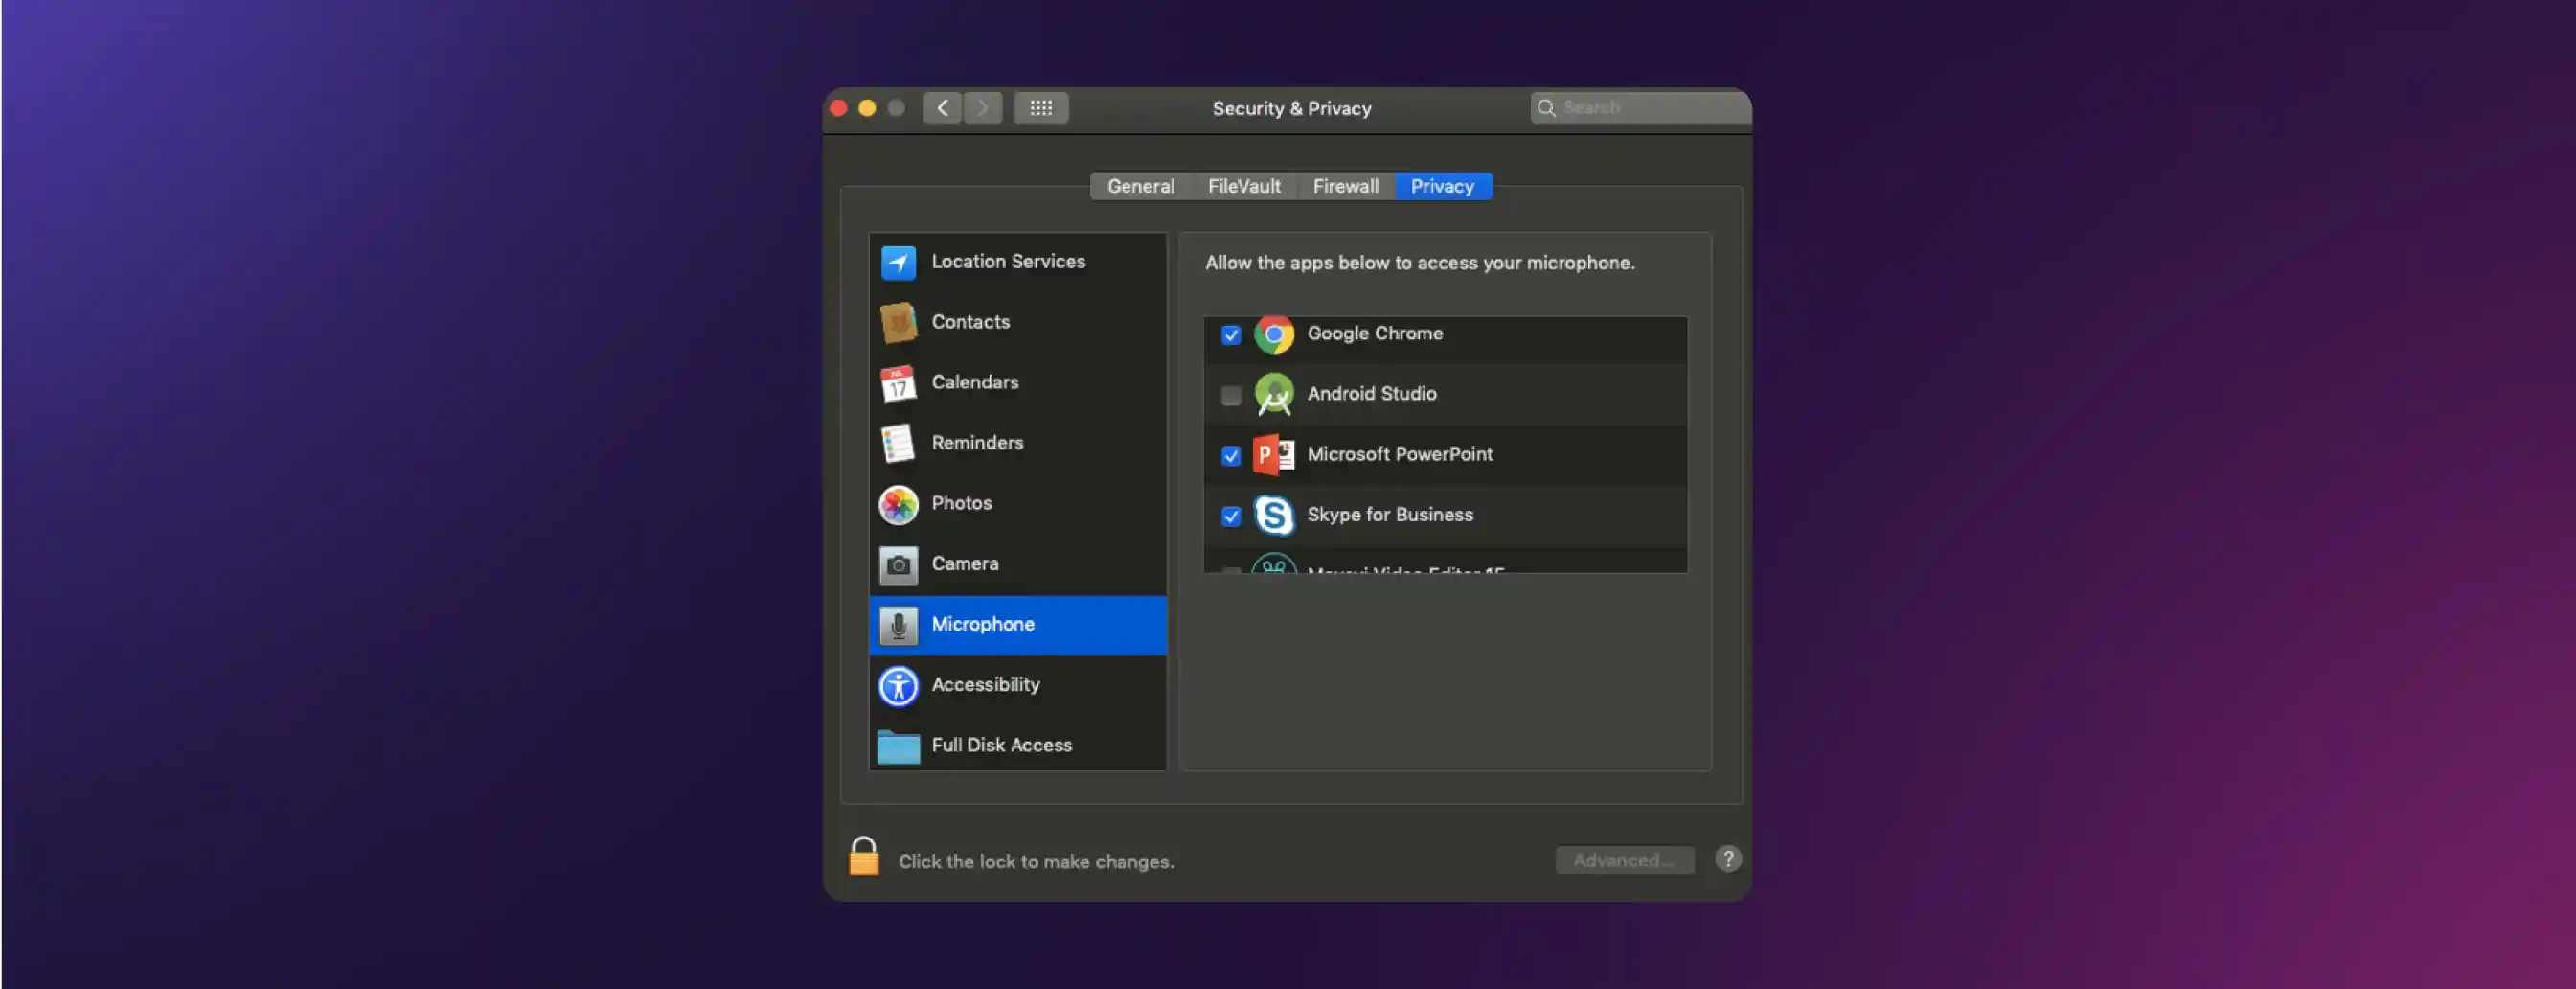
Go to Mac -> System Preferences again and this time, select Security and Privacy.
Now, select the Microphone tab on the left and make sure that Power Point is included and checked in the last as shown below:
For Windows users, you can go to System Preferences and setup similar audio options.
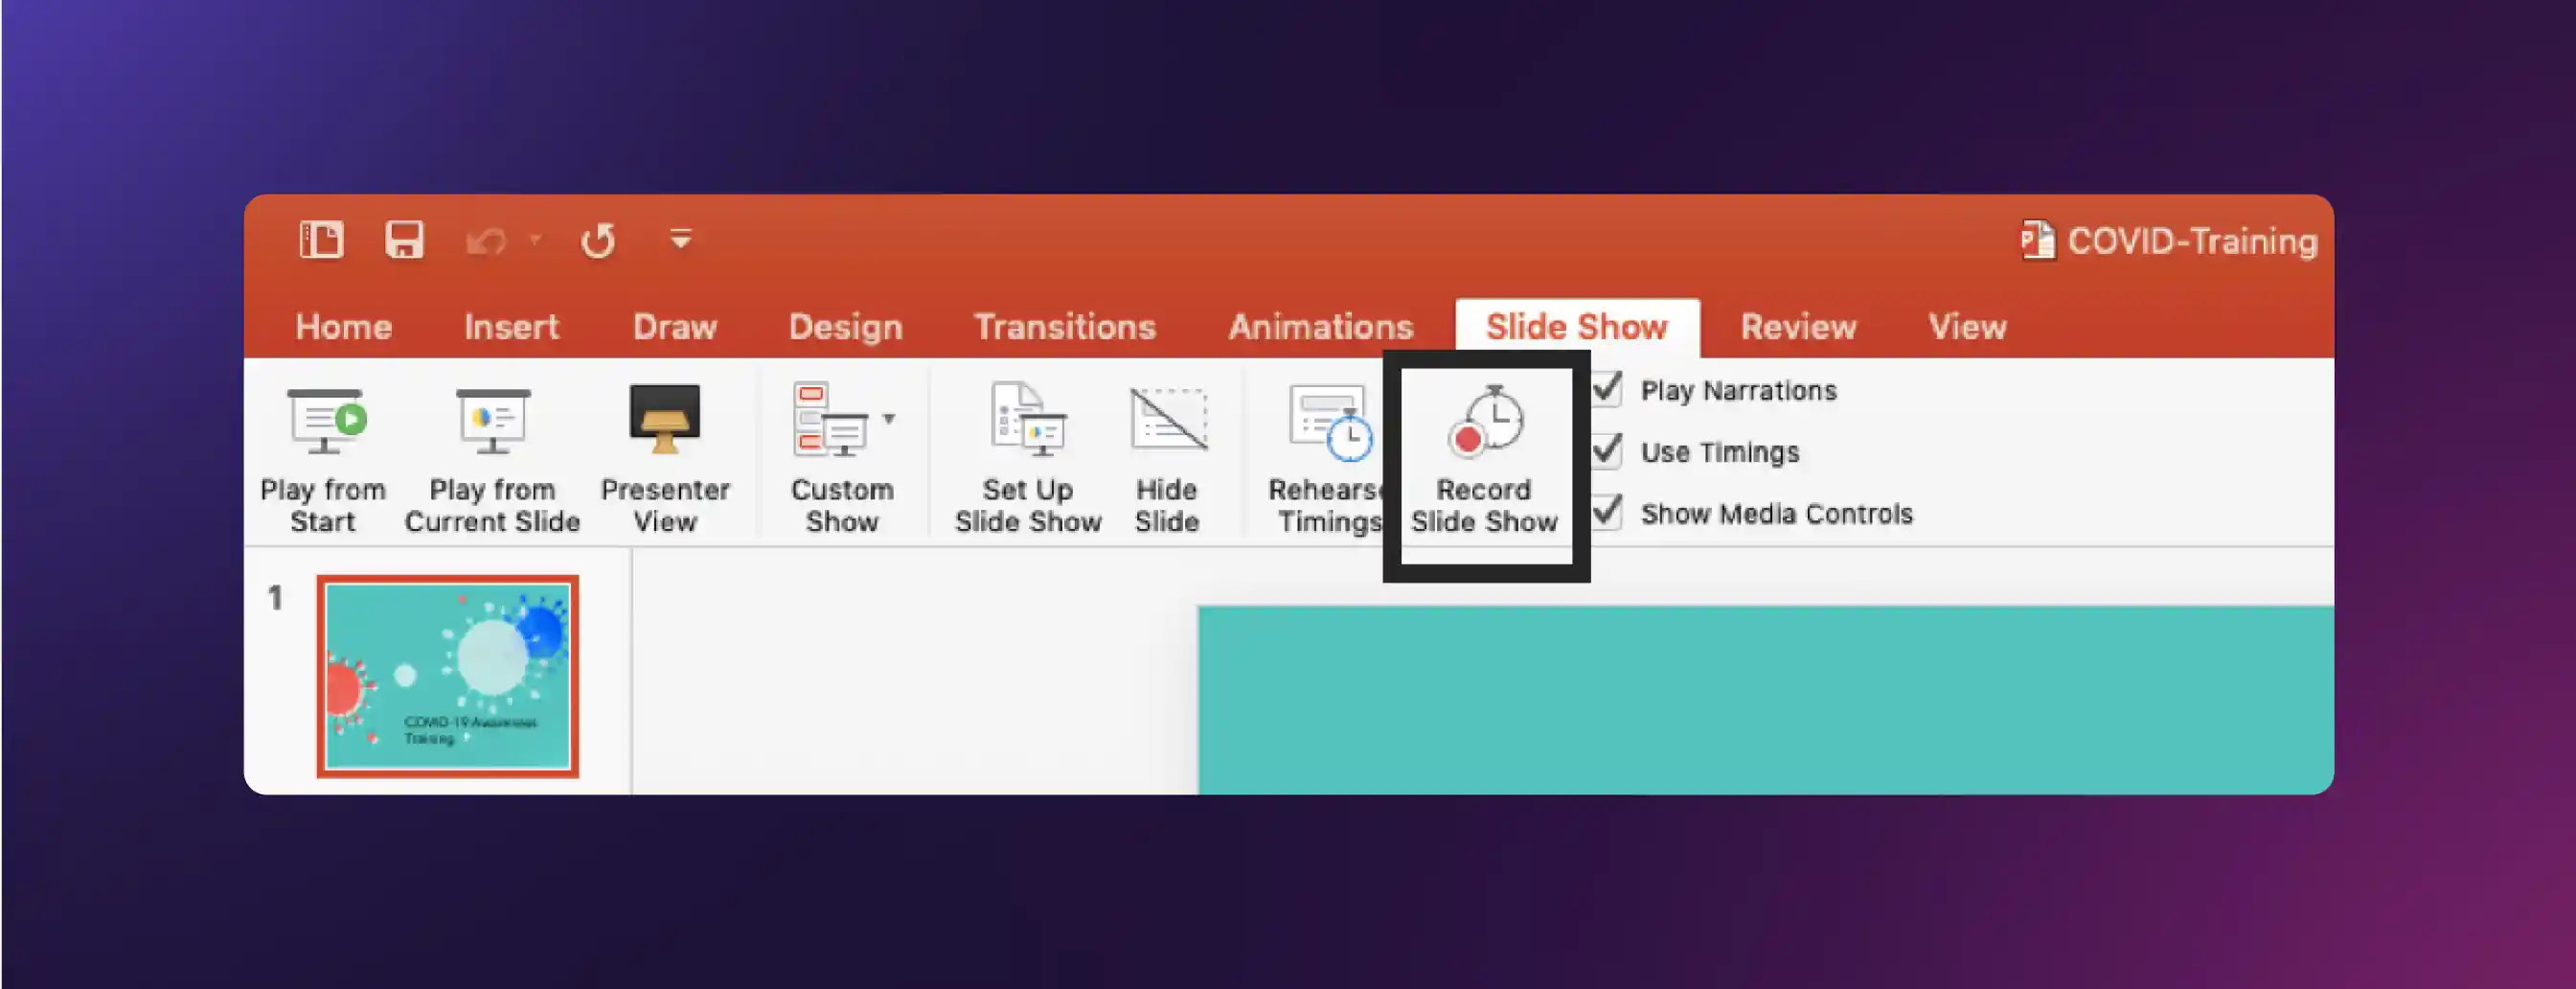
Step 5: Start Slide Show Recording
Go to Slide show in the top menu and press the Record Slide Show Box. It will automatically start recording your audio as well as the slide timing as soon as it switches to the next screen. For Mac users the default option available is to Start from the Beginning. For Windows users, you would have the choice to either Start from the Beginning or Start from Current slide.
Step 6: Record narration for all slides together or one slide at a time
Recording has started once you are on this screen. If you are not ready yet, you can always use the pause button and resume once your mic and script are all set up.
Depending on what you are more comfortable with, you can either record all narrations in one go, or record one slide or couple of slides at a time. Whenever you need to take a break, you can either pause or just stop recording and restart again from the new slide.

A couple of important things to remember while recording voice over in your PowerPoint file:
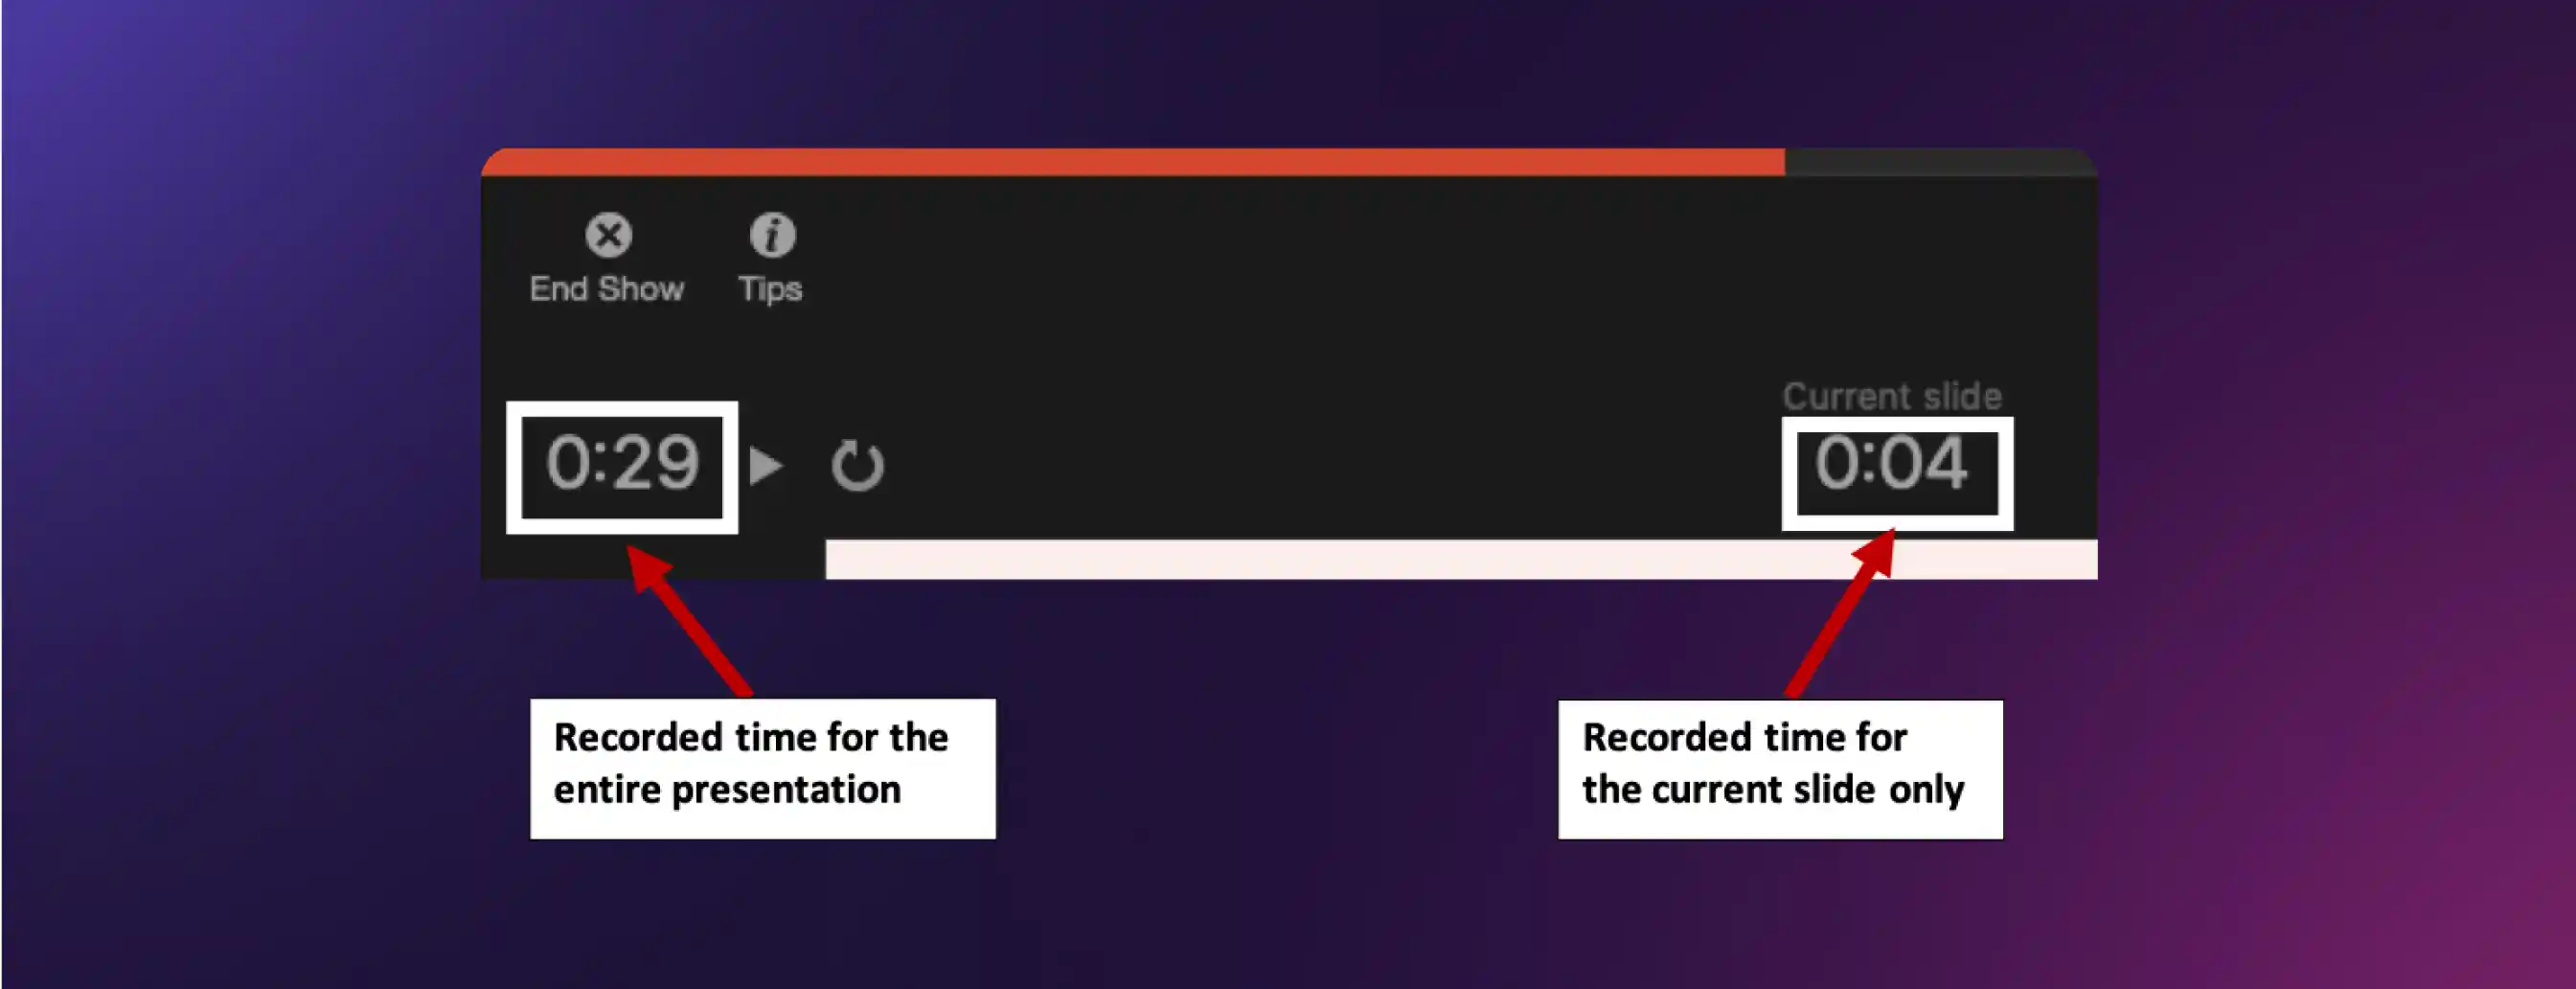
Basic Control Buttons for a clear recording and slide navigation
Step 7: End Show to stop recorded audio
Once you are done recording, press the End Show button on top left. This will give you a pop-up to save the recording. Click yes to proceed.

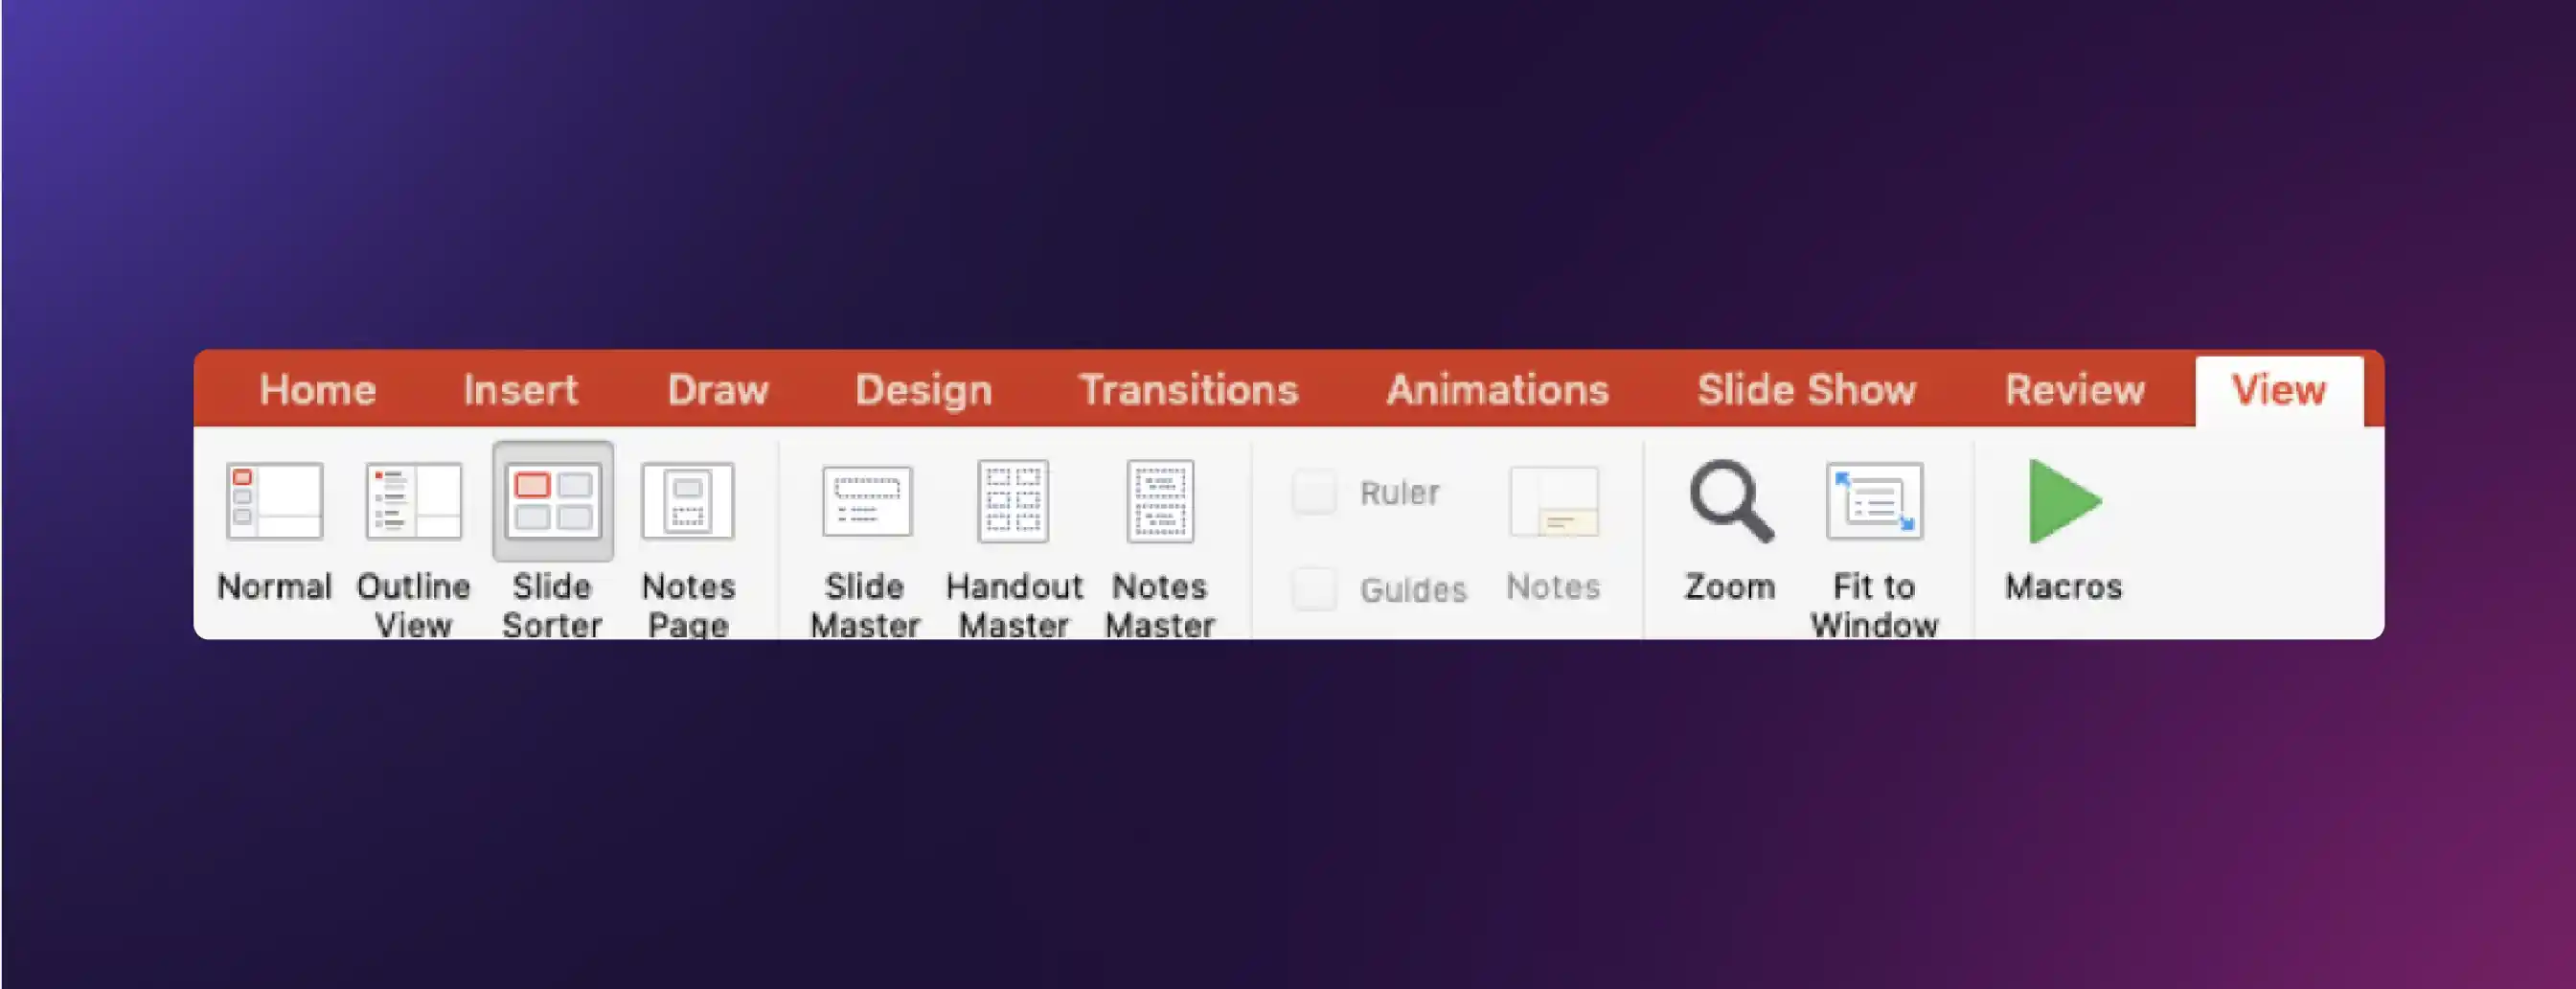
This will take you to the Slide Sorter view as shown below:
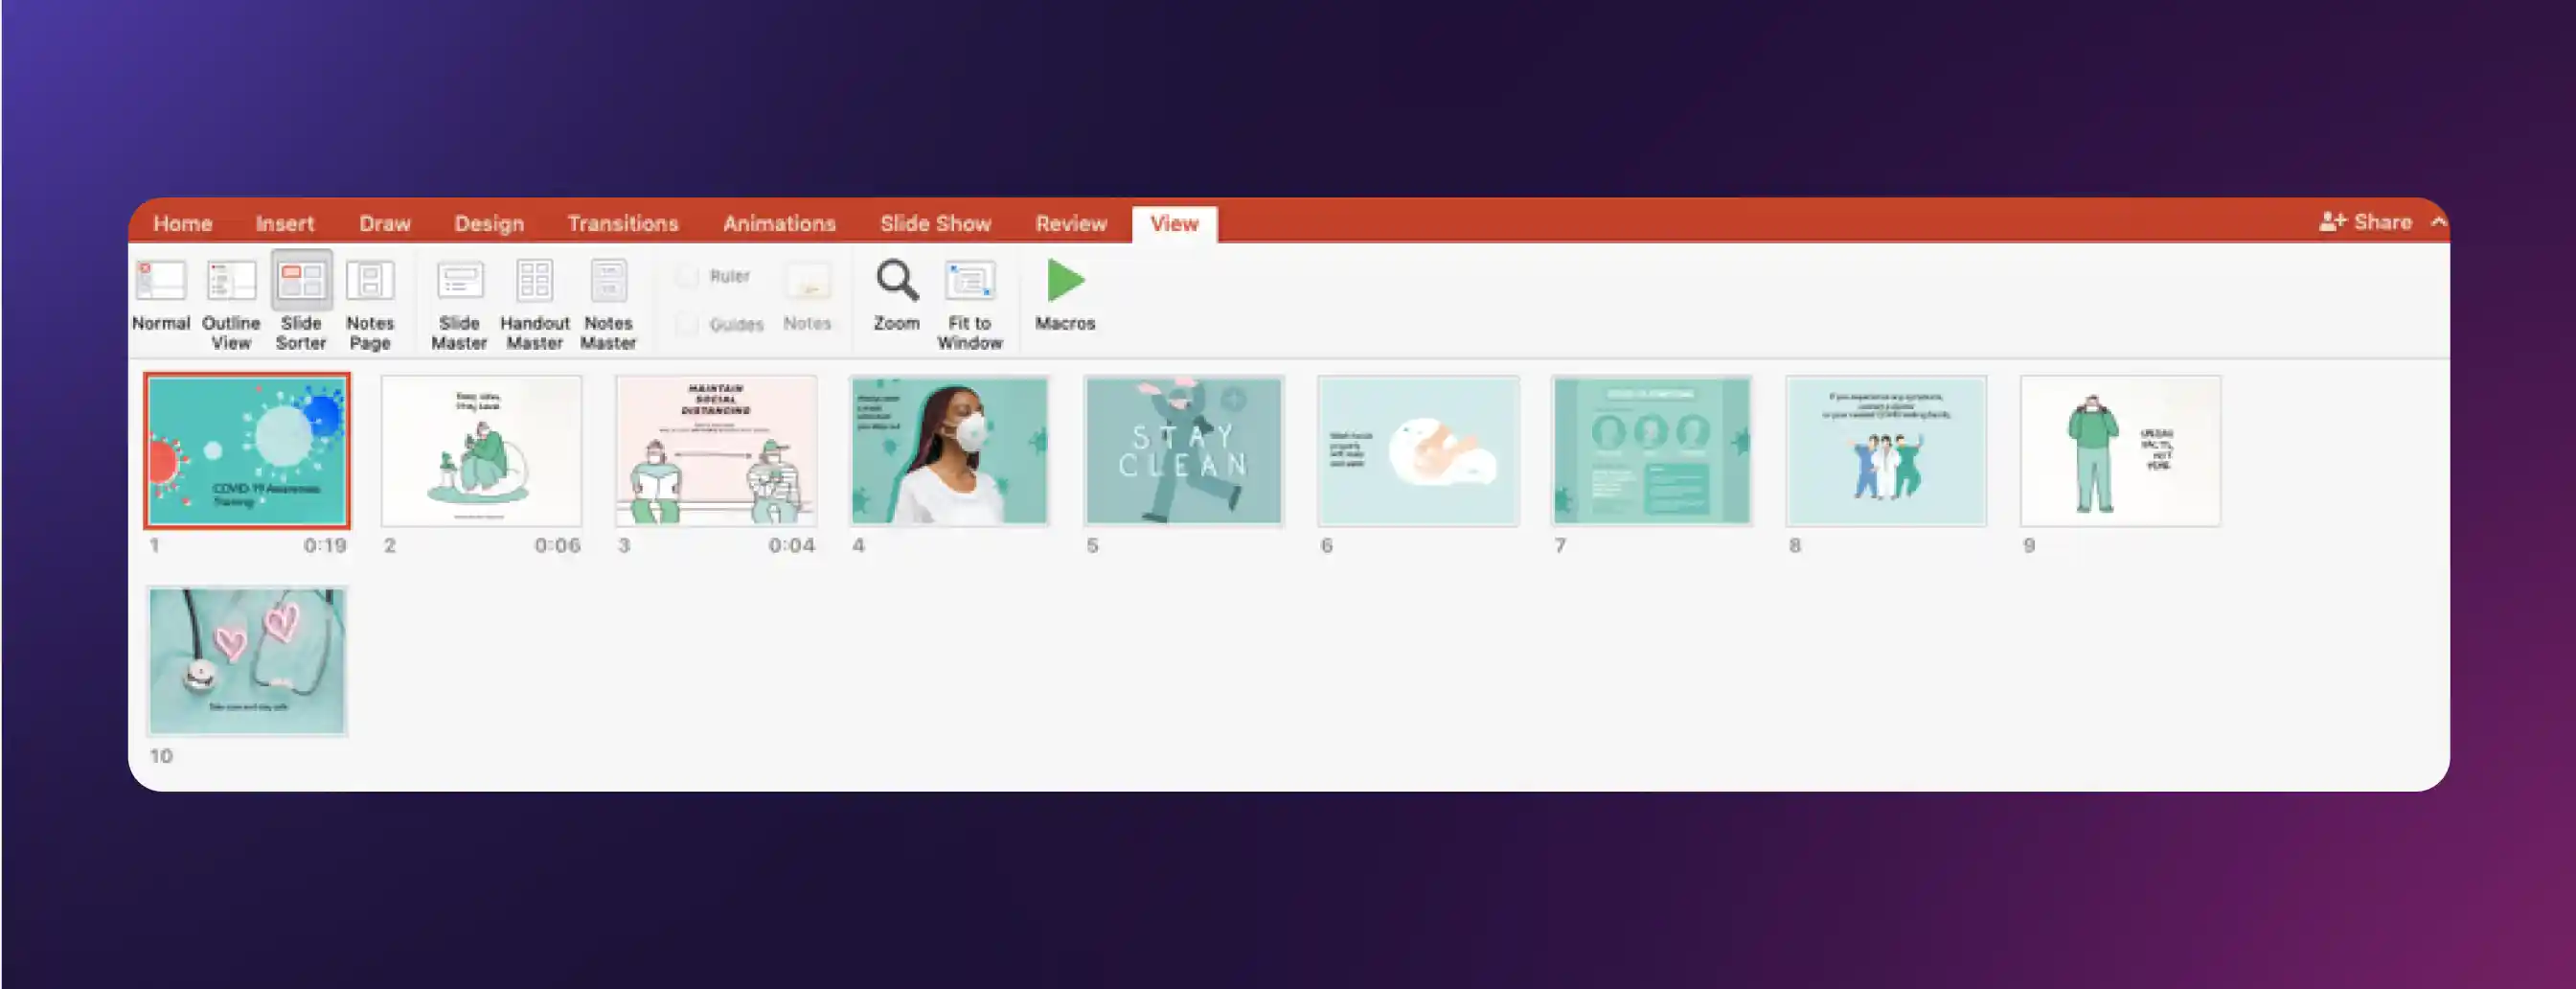
Here you can see the recorded narration time for each slide. Note that this is the total time each slide will appear on the slideshow, irrespective of how long the narration actually was. This would help you get an idea of how long the total voice over will take and if you need to speed up or slow down a bit basis your allotted presentation time.
Switch to Normal View: If you want to switch back to the normal view for further editing or viewing, press Normal in the view tab as shown below.
Once you switch back to Normal view, you would be able to see an audio button appear on all slides that you have recorded so far.
Step 8: Preview your narrated presentation
Play your audio for each slide and check if everything is good to go. If you are recording one slide or few slides at a time, it is especially useful to listen to the recording as you go so that you can quickly make changes as required.
If you plan to record the entire presentation in one go, it is recommended to do a test recording with one slide first to make sure the audio quality is good before you record the entire presentation.

Step 9: Re-recording or editing the audio for a specific slide
If something wasn't right about the recording for a particular slide, you can re-record it. Just Select the Audio button and press Delete on the keyboard.

Note that by doing this, only the audio for that particular slide would get deleted, the audio for the other slides will still stay intact.
Step 10: Save narrated PowerPoint as a video narration or PowerPoint show format
If you want to save the presentation with voice over in PowerPoint format, you can just save the file in Power Point Show (.ppsx) format.
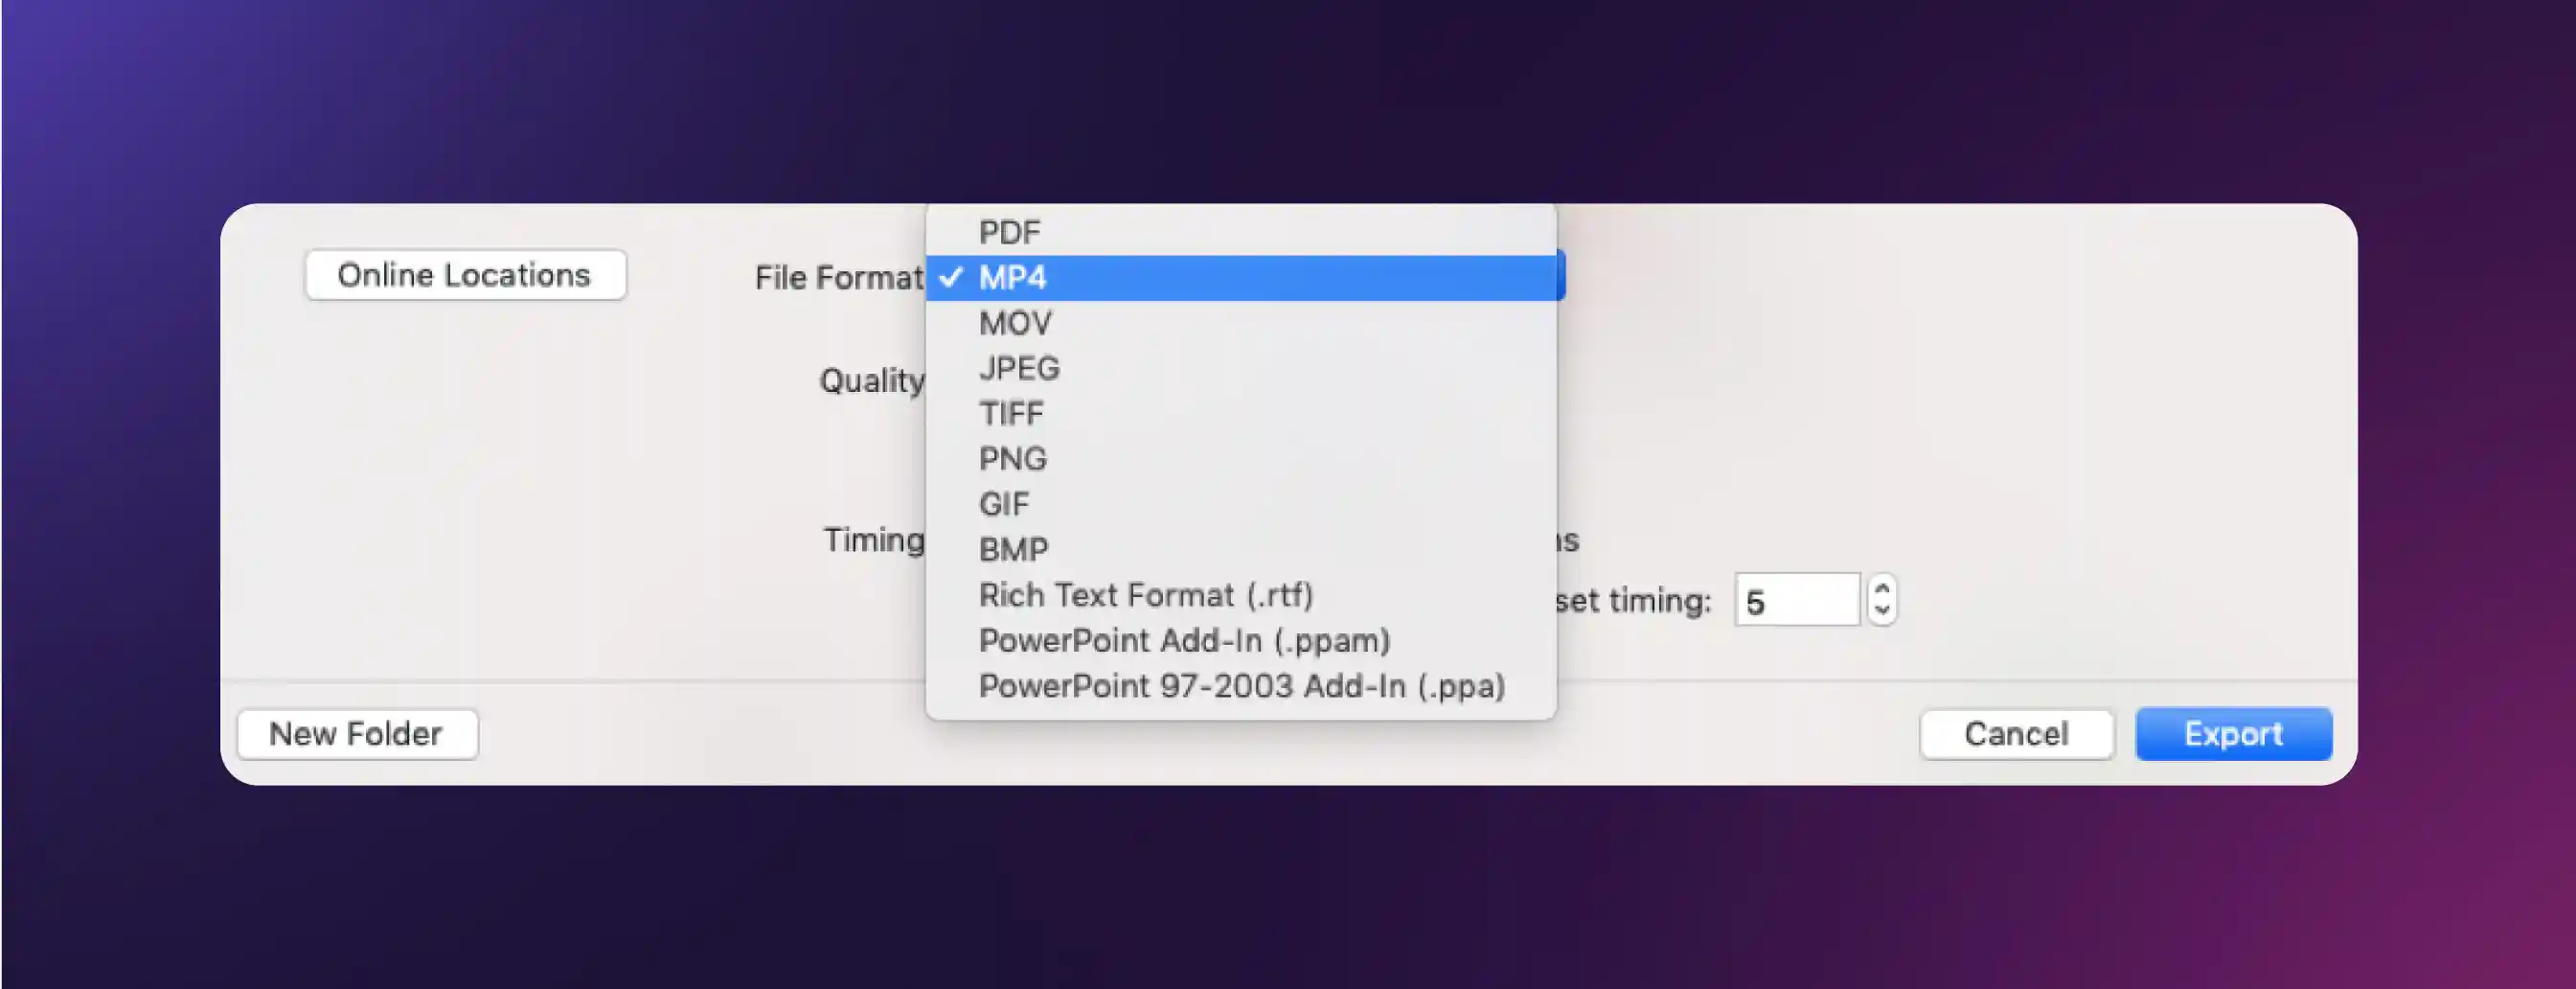
If you want to save it as a video to upload on YouTube or to share with students or colleagues who may not have PowerPoint software installed, export it as MP4 or MOV file. This video narration, once exported would no longer need a PowerPoint software to play.
Note :This is only supported for Microsoft 365 for Mac or PowerPoint 2019 for Mac. Earlier versions of Powerpoint for Mac do not support exporting video formats with narration.
By following this 10 step tutorial, you can create a narrated presentation with your own voice over. Remember this requires some practice, so if it is your first time, be patient and make sure to follow the pre-preparation steps covered in the first part of this article.
We hope that you find this tutorial useful and are able to create your perfect PowerPoint voice over presentation.
Keeping your data safe


Learn how we help enterprises expand globally at scale


