Create Your Own Podcast Generator Like NotebookLM in 2026: The Ultimate Guide
The Audio Overview feature in Google's NotebookLM created a brand new use case for AI in research. You no longer needed to listen to a monologue of audio reading a research paper, it was now a fun and engaging podcast where two different AI voices discussed the topic. For developers like us, this presents an interesting project to take up and create our own podcast generator — but with the added flexibility of custom voice selection and format options.
In fact, research is only one use case because the technology unlocks a multitude of possibilities. Be it education where you can transform standard textbook teaching into a dynamic student-teacher discussion or news media where you convert written news into an engaging debate between two news anchors.
One big use case can be content creators using the technology to quickly churn out content pieces that are a bit beyond their usual style. Imagine a MKBHD style product review but where he is also talking to another influencer.
With Murf AI’s APIs, you can now create a podcast generator that takes a simple topic input, generates a well-structured script using GPT, and converts it into lifelike speech.
Podcast Generator with Murf AI: What We're Building
Our AI podcast generator will allow users to:
- Enter a podcast topic.
- Select a format (e.g., interview, discussion, monologue).
- Upload a PDF file to extract text (will be used as context for the blog).
- Generate a complete podcast script using GPT.
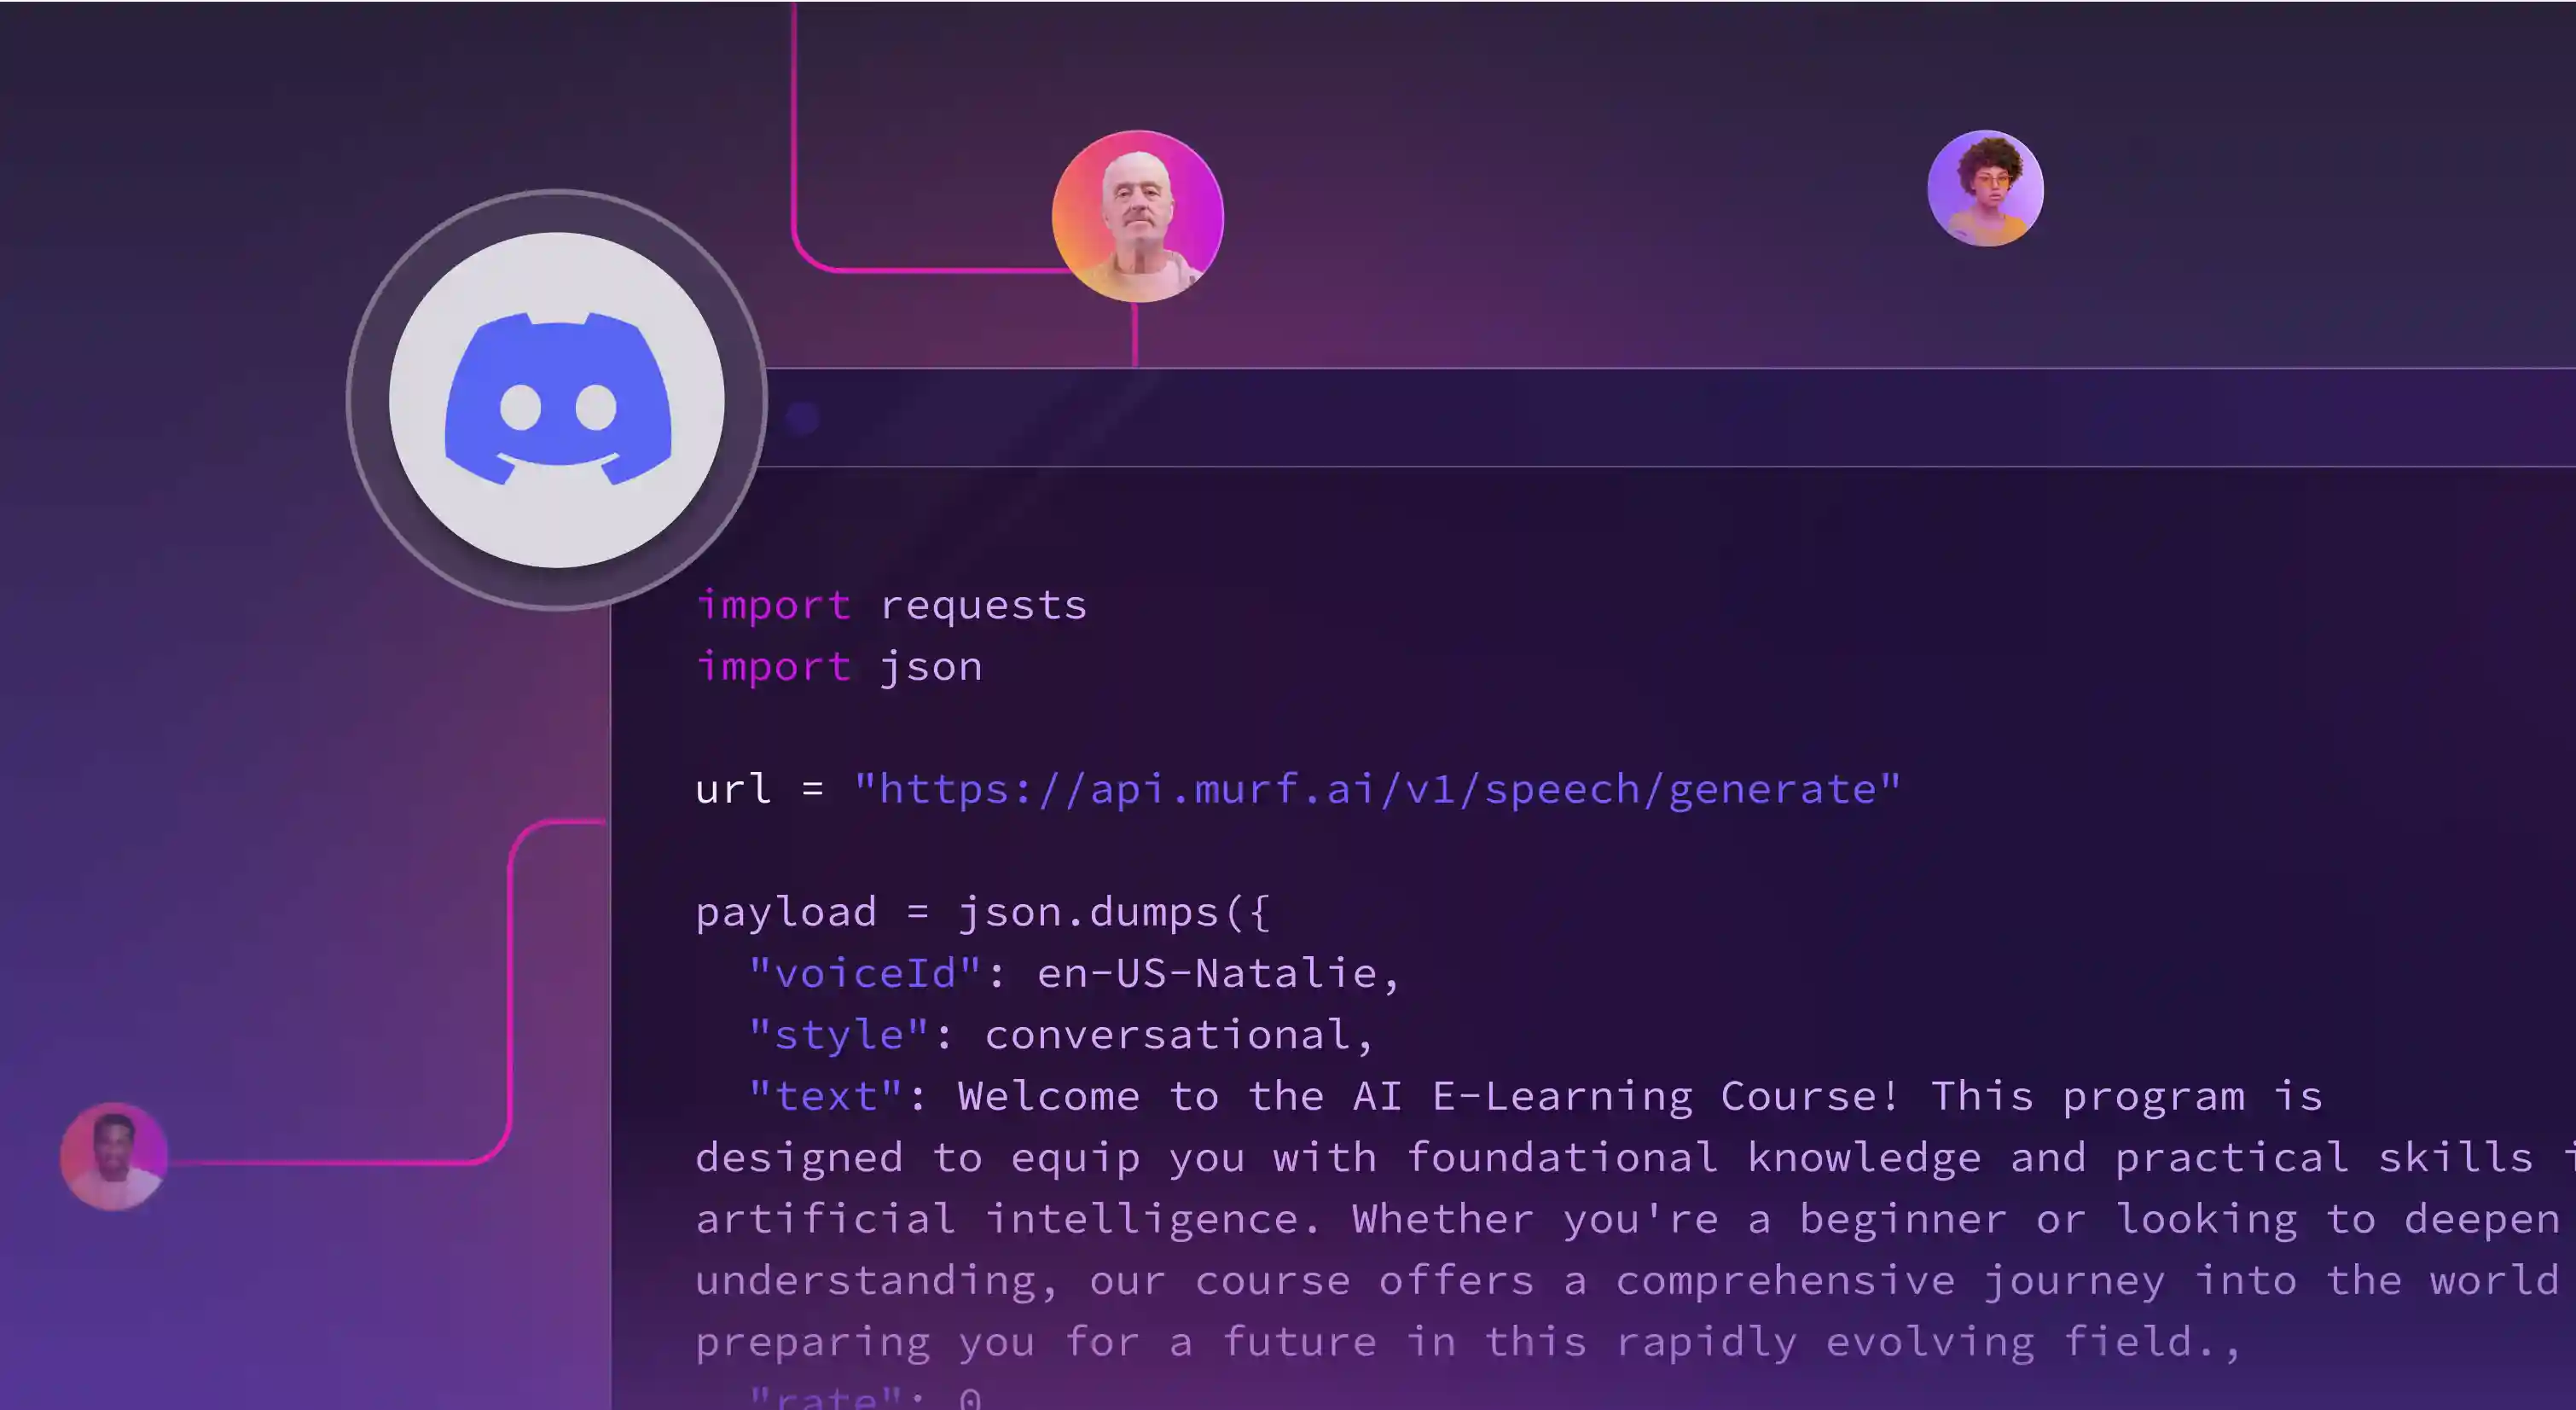
- Convert the script into audio using Murf AI’s Text-to-Speech API.
For example, if a user selects "The Future of AI" as the topic and "Interview" as the format, GPT will create a script like this:
{{qq-border-start}}
{
   "conversation":[
      {
         "speaker":"Sarah",
         "voiceId":"en-US-amara",
         "text":"Welcome to Tech Talk! Today we're diving into the world of artificial intelligence."
      },
      {
         "speaker":"Mike",
         "voiceId":"en-US-miles",
         "text":"Thanks for having me, Sarah. I'm excited to share my insights about AI's impact on our daily lives."
      }
   ]
}
{{qq-border-end}}
Once the script is generated, Murf.AI transforms it into an engaging podcast conversation.
Prerequisites for building a podcast generator
Before we dive in, make sure you have:
- Python 3.7+ installed
- Node.js and npm ready to go
- A Murf.AI API key (Login to the Murf API platform and generate a key)
- An OpenAI API key
- Basic knowledge of Flask and React
- Your favorite code editor
Project Structure
First things first - let's get organized. Here's how we'll arrange our project folders/files:
{{qq-border-start}}
podcast-generator/
├── backend/
│   ├── app.py
│   ├── requirements.txt
│   └── .env
└── frontend/
    ├── src/
    │   ├── components/
    │   ├── services/
    │   └── App.js
    ├── package.json
    └── .env
{{qq-border-end}}
Part 1: Setting Up the Backend
Before we dive into building our backend, there's one crucial step we need to take care of - installing the Murf.AI Python package. Open your terminal and run this command:
{{qq-border-start}}
pip3 install murf
{{qq-border-end}}
This command will fetch the Murf Python package from the official PyPI repository, giving us access to all the Text-to-Speech goodness we'll need.
Now, let's start creating our Flask backend. This will handle token generation and serve as our bridge to Murf.AI's API.
{{qq-border-start}}
# backend/app.py
from flask import Flask, jsonify, request
import os
from murf import Murf

app = Flask(__name__)

# Initialize Murf client
murf_client = Murf(api_key=os.getenv('MURF_API_KEY'))

@app.route('/generate-token', methods=['GET', 'OPTIONS'])
def generate_token():
    if request.method == 'OPTIONS':
        return '', 204  # Preflight request, no content needed

    try:
        token_response = murf_client.auth.generate_token()
        return jsonify({
            'token': token_response.token,
            'expiryInEpochMillis': token_response.expiry_in_epoch_millis
        })
    except Exception as e:
        return jsonify({'error': str(e)}), 500

if __name__ == '__main__':
    app.run(debug=True)
{{qq-border-end}}
Create your environment files:
{{qq-border-start}}
# backend/.env
FLASK_APP=app.py
FLASK_ENV=development
MURF_API_KEY=your_murf_api_key_here
PORT=5000
{{qq-border-end}}
{{qq-border-start}}
// frontend/.env
VITE_API_URL=http://127.0.0.1:5000
VITE_OPENAI_API_KEY=your_openai_api_key_here
{{qq-border-end}}
Part 2: Building the Frontend with Vite
Here comes the exciting part - creating an interface where all the podcast magic will happen. We're using Vite for our React front end.
2.a: Setting Up the API Service
First, let's create our communication hub. This service layer will be like our dedicated phone line to the backend, handling all our API calls:
{{qq-border-start}}
//frontend/src/services/api.js
const API_URL = import.meta.env.VITE_API_URL;

export const apiService = {
 // Get Murf authentication token
 getToken: async () => {
   try {
     const response = await fetch(`${API_URL}/generate-token`);
     if (!response.ok) {
       throw new Error('Failed to fetch token');
     }
     return await response.json();
   } catch (error) {
     console.error('Token fetch error:', error);
     throw error;
   }
 },

 // Generate podcast script using GPT
 generateScript: async (inputData, format) => {
   const { topic, rawText } = inputData;

   let prompt;
   if (topic && rawText) {
     // If both topic and raw text are provided
     prompt = `You are a podcast script generator. Create a natural-sounding ${format} script based on the following topic:\nTopic: "${topic}", and the raw text\nRaw Text: <raw_text>"${rawText}"</raw_text>. Output should be a JSON object with a 'conversation' array containing objects with 'speaker' (names), 'voiceId', and 'text' fields. Use 'en-US-amara' for female voices and 'en-US-miles' for male voices for voiceIDs.`;
   } else if (rawText) {
     // If only raw text is provided
     prompt = `You are a podcast script generator. Create a natural-sounding ${format} script based on the following raw text\nRaw Text: <raw_text>"${rawText}"</raw_text>. Output should be a JSON object with a 'conversation' array containing objects with 'speaker' (names), 'voiceId', and 'text' fields. Use 'en-US-amara' for female voices and 'en-US-miles' for male voices for voiceIDs.`;
   } else if (topic) {
     // If only topic is provided
     prompt = `You are a podcast script generator. Create a natural-sounding ${format} script based on the topic:\nTopic: "${topic}". Output should be a JSON object with a 'conversation' array containing objects with 'speaker' (names), 'voiceId', and 'text' fields. Use 'en-US-amara' for female voices and 'en-US-miles' for male voices for voiceIDs.`;
   }

   try {
     const response = await fetch('https://api.openai.com/v1/chat/completions', {
       method: 'POST',
       headers: {
         'Content-Type': 'application/json',
         'Authorization': `Bearer ${import.meta.env.VITE_OPENAI_API_KEY}`
       },
       body: JSON.stringify({
         model: "gpt-4o-mini",
         response_format: { "type": "json_object" },
         messages: [{
           role: "system",
           content: prompt
         }],
       })
     });

     if (!response.ok) {
       throw new Error('Script generation failed');
     }

     const data = await response.json();
     return JSON.parse(data.choices[0].message.content);
   } catch (error) {
     console.error('Script generation error:', error);
     throw error;
   }
 },

 // Generate audio using Murf API
 generateAudio: async (token, scriptLine) => {
   try {
     const response = await fetch('https://api.murf.ai/v1/speech/generate', {
       method: 'POST',
       headers: {
         'Content-Type': 'application/json',
         'token': token
       },
       body: JSON.stringify(scriptLine)
     });
     if (!response.ok) {
       throw new Error('Audio generation failed');
     }
     return await response.json();
   } catch (error) {
     console.error('Audio generation error:', error);
     throw error;
   }
 }
};
{{qq-border-end}}
2.b: Let’s create a Topic Input Component
To allow users to provide a topic and select a format for their podcast, we'll create a TopicInput component. This component will consist of:
- A text input for entering the podcast topic.
- A file upload input for uploading a PDF file, from which text will be extracted.
- A dropdown menu to choose the podcast format (e.g., interview, discussion, monologue).
- A submit button that triggers script generation.
Before we start building the component, make sure to install the necessary library for PDF handling:
{{qq-border-start}}
npm install pdfjs-dist
{{qq-border-end}}
This interactive form ensures users can easily specify their preferences before generating a script with GPT. Next, let’s build the component in React.
{{qq-border-start}}
//frontend/src/components/TopicInput.jsx
import React, { useState } from 'react';
import * as pdfjs from "pdfjs-dist/build/pdf";
import "pdfjs-dist/build/pdf.worker.mjs";

const TopicInput = ({ onTopicSubmit, disabled }) => {
 const [topic, setTopic] = useState('');
 const [format, setFormat] = useState('interview');
 const [rawText, setRawText] = useState('');

 const handleFileUpload = async (e) => {
   try {
     const file = e.target.files[0];
     if (file) {
       console.log("File selected:", file); // Log the file selected
       const reader = new FileReader();
       reader.onload = async (event) => {
         try {
           const typedarray = new Uint8Array(event.target.result);
           console.log("File read as array buffer:", typedarray); // Log the file content as an array buffer
           const pdf = await pdfjs.getDocument(typedarray).promise;
           let textContent = '';

           for (let i = 1; i <= pdf.numPages; i++) {
             const page = await pdf.getPage(i);
             const text = await page.getTextContent();
             textContent += text.items.map(item => item.str).join(' ') + '\n';
             console.log(`Page ${i} text extracted`); // Log progress
           }
            setRawText(textContent); // Store the extracted text
           console.log("Text extraction completed", textContent);
         } catch (error) {
           console.error("Error extracting text from PDF:", error); // Log any errors during PDF processing
         }
       };
       reader.readAsArrayBuffer(file); // Read the file as an ArrayBuffer
     } else {
       console.log("No file selected");
     }
   } catch (error) {
     console.error("Error handling file upload:", error); // Log any errors during file selection or reading
   }
 };

 const handleSubmit = (e) => {
   e.preventDefault();
   // Prepare the input data based on what is provided
   const inputData = {
     format,
     sourceType: 'combined',
   };

   if (rawText && topic) {
     // If both topic and raw text are provided
     inputData.inputData = { topic, rawText };
   } else if (rawText) {
     // If only raw text is provided
     inputData.inputData = { rawText };
   } else if (topic) {
     // If only topic is provided
     inputData.inputData = { topic };
   }

   onTopicSubmit(inputData);
 };

 return (
   <div style={{ maxWidth: '768px', margin: '0 auto', padding: '24px', display: 'flex', flexDirection: 'column', gap: '24px' }}>
     <h2 style={{ fontSize: '24px', fontWeight: 'bold', textAlign: 'center', marginBottom: '24px' }}>Generate Podcast Script</h2>
     <input
       type="text"
       value={topic}
       onChange={(e) => setTopic(e.target.value)}
       placeholder="Enter your podcast topic..."
       disabled={disabled}
       style={{
         width: '100%',
         padding: '12px',
         border: '1px solid #ddd',
         borderRadius: '8px',
         outline: 'none',
         transition: 'border-color 0.3s',
       }}
     />
     <input type="file" accept=".pdf" onChange={handleFileUpload} disabled={disabled} />
     <select
       value={format}
       onChange={(e) => setFormat(e.target.value)}
       disabled={disabled}
       style={{
         width: '100%',
         padding: '12px',
         border: '1px solid #ddd',
         borderRadius: '8px',
         outline: 'none',
         transition: 'border-color 0.3s',
       }}
     >
       <option value="interview">Interview</option>
       <option value="discussion">Discussion</option>
       <option value="monologue">Monologue</option>
     </select>
     <button
       onClick={handleSubmit}
       disabled={disabled || (!topic && !rawText)}
       style={{
         width: '100%',
         padding: '12px 24px',
         backgroundColor: '#3b82f6',
         color: 'white',
         borderRadius: '8px',
         cursor: disabled || (!topic && !rawText) ? 'not-allowed' : 'pointer',
         backgroundColor: disabled || (!topic && !rawText) ? '#d1d5db' : '#2563eb',
         transition: 'background-color 0.3s',
       }}
     >
       Generate Script
     </button>
   </div>
 );
};

export default TopicInput;
{{qq-border-end}}
2.c: Creating the Script Input Component
Once the podcast topic, pdf and format are selected, we need a way to display and edit the generated script before converting it into audio. Unlike NotebookLM which generates fixed-format content, our ScriptInput component will:
- Show the AI-generated podcast script in an editable text area
- Allow users to make modifications to the script if needed
- Include a button to confirm and proceed with audio generation
This component ensures users have full control over the final script, making it more personalized and polished before transforming it into speech. Now, let’s build the component in React.
{{qq-border-start}}
// frontend/src/components/ScriptInput.jsx
import React, { useState, useEffect } from 'react';

const ScriptInput = ({ initialScript, onScriptSubmit, disabled }) => {
 const [scriptData, setScriptData] = useState('');

 useEffect(() => {
   if (initialScript) {
     setScriptData(initialScript);
   }
 }, [initialScript]);

 const handleSubmit = (e) => {
   e.preventDefault();
   try {
     const parsedScript = JSON.parse(scriptData);
     onScriptSubmit(parsedScript);
   } catch (error) {
     alert('Invalid JSON format');
   }
 };

 return (
   <div style={{ maxWidth: '768px', margin: '0 auto', padding: '24px', display: 'flex', flexDirection: 'column', gap: '24px' }}>
     <h2 style={{ fontSize: '24px', fontWeight: 'bold', textAlign: 'center', marginBottom: '24px' }}>Edit Your Podcast Script</h2>
     <textarea
       value={scriptData}
       onChange={(e) => setScriptData(e.target.value)}
       placeholder="Script will appear here..."
       rows={10}
       disabled={disabled}
       style={{
         width: '100%',
         padding: '16px',
         border: '1px solid #ddd',
         borderRadius: '8px',
         outline: 'none',
         transition: 'border-color 0.3s',
         minHeight: '160px',
         fontFamily: 'monospace',
       }}
     />
     <button
       onClick={handleSubmit}
       disabled={disabled}
       style={{
         width: '100%',
         padding: '12px 24px',
         backgroundColor: '#3b82f6',
         color: 'white',
         borderRadius: '8px',
         cursor: disabled ? 'not-allowed' : 'pointer',
         backgroundColor: disabled ? '#d1d5db' : '#2563eb',
         transition: 'background-color 0.3s',
       }}
     >
       Generate Podcast
     </button>
   </div>
 );
};

export default ScriptInput;
{{qq-border-end}}
2.d: Creating the Audio player and loading spinner
What's a podcast generator without a way to play back your creations? Let's build an audio player and add a loading spinner to keep your users engaged:
{{qq-border-start}}
// frontend/src/components/AudioPlayer.jsx
import React, { useState, useEffect } from 'react';
import { Play, Pause } from 'lucide-react';

const AudioPlayer = ({ audioFiles }) => {
 const [isPlaying, setIsPlaying] = useState(false);
 const [currentAudioIndex, setCurrentAudioIndex] = useState(0);
 const audioElements = audioFiles.map(url => new Audio(url));

 useEffect(() => {
   return () => {
     audioElements.forEach(audio => {
       audio.pause();
       audio.currentTime = 0;
     });
   };
 }, []);

 const playSequentially = async () => {
   setIsPlaying(true);
   for (let i = currentAudioIndex; i < audioElements.length; i++) {
     setCurrentAudioIndex(i);
     try {
       await new Promise((resolve, reject) => {
         const audio = audioElements[i];
         audio.onended = resolve;
         audio.onerror = reject;
         audio.play();
       });
     } catch (error) {
       console.error('Error playing audio:', error);
       break;
     }
   }
   setIsPlaying(false);
   setCurrentAudioIndex(0);
 };

 const handlePause = () => {
   audioElements[currentAudioIndex].pause();
   setIsPlaying(false);
 };

 const togglePlayPause = () => {
   if (isPlaying) {
     handlePause();
   } else {
     playSequentially();
   }
 };

 if (!audioFiles || audioFiles.length === 0) return null;

 return (
   <div style={{ maxWidth: '768px', margin: '0 auto', padding: '24px', textAlign: 'center' }}>
     <h2 style={{ fontSize: '24px', fontWeight: 'bold', marginBottom: '24px' }}>Generated Podcast</h2>
     <button
       onClick={togglePlayPause}
       style={{
         padding: '16px',
         backgroundColor: '#3b82f6',
         color: 'white',
         borderRadius: '50%',
         cursor: 'pointer',
         transition: 'background-color 0.3s',
         outline: 'none',
       }}
       onMouseEnter={(e) => e.target.style.backgroundColor = '#2563eb'}
       onMouseLeave={(e) => e.target.style.backgroundColor = '#3b82f6'}
     >
       {isPlaying ? <Pause size={24} /> : <Play size={24} />}
     </button>
   </div>
 );
};

export default AudioPlayer;
{{qq-border-end}}
The Loading Spinner
{{qq-border-start}}
// frontend/src/components/LoadingSpinner.jsx

import React from 'react';
// import './LoadingSpinner.css'

const LoadingSpinner = () => {
  return (
    <div className="loading-spinner">
      <div className="spinner"></div>
      <p>Generating podcast... Please wait.</p>
    </div>
  );
};

export default LoadingSpinner;
{{qq-border-end}}
2.e: The Main App Component
This is where everything comes together. Our main App component will orchestrate all the moving parts of our application:
{{qq-border-start}}
//frontend/src/App.jsx
import React, { useState, useEffect } from 'react';
import { apiService } from './services/api';
import TopicInput from './components/TopicInput';
import ScriptInput from './components/ScriptInput';
import AudioPlayer from './components/AudioPlayer';

const App = () => {
  const [token, setToken] = useState(null);
  const [finalAudio, setFinalAudio] = useState(null);
  const [isLoading, setIsLoading] = useState(false);
  const [error, setError] = useState(null);
  const [generatedScript, setGeneratedScript] = useState(null);

  useEffect(() => {
    const fetchToken = async () => {
      try {
        setIsLoading(true);
        const tokenData = await apiService.getToken();
        setToken(tokenData.token);
      } catch (err) {
        setError('Failed to initialize application. Please try again.');
      } finally {
        setIsLoading(false);
      }
    };

    fetchToken();
  }, []);

  const handleTopicSubmit = async ({ inputData, format }) => {
    if (!token) {
      setError('Application not properly initialized. Please refresh.');
      return;
    }

    setIsLoading(true);
    setError(null);
    setFinalAudio(null);

    try {
      const script = await apiService.generateScript(inputData, format);
      setGeneratedScript(script);
    } catch (err) {
      setError('Failed to generate script. Please try again.');
    } finally {
      setIsLoading(false);
    }
  };

  const handleScriptSubmit = async (scriptData) => {
    if (!token) {
      setError('Application not properly initialized. Please refresh.');
      return;
    }

    setIsLoading(true);
    setError(null);

    try {
      const audioPromises = scriptData.conversation.map(line =>
        apiService.generateAudio(token, {
          text: line.text,
          voiceId: line.voiceId,
          format: 'WAV',
          variation: 3
        })
      );

      const audioResponses = await Promise.all(audioPromises);
      setFinalAudio(audioResponses.map(response => response.audioFile));
    } catch (err) {
      setError('Failed to generate podcast. Please try again.');
    } finally {
      setIsLoading(false);
    }
  };

  if (isLoading) {
    return (
      <div style={{ display: 'flex', alignItems: 'center', justifyContent: 'center', minHeight: '100vh', minWidth: '100vw' }}>
        <div style={{ textAlign: 'center' }}>
          <div style={{ animation: 'spin 1s linear infinite', borderTop: '2px solid #3b82f6', borderBottom: '2px solid #3b82f6', borderRadius: '50%', width: '48px', height: '48px', margin: '0 auto', marginBottom: '16px' }}></div>
          <p>Loading...</p>
        </div>
      </div>
    );
  }

  if (error) {
    return (
      <div style={{ maxWidth: '640px', margin: '0 auto', padding: '24px', textAlign: 'center' }}>
        <div style={{ backgroundColor: '#fee2e2', border: '1px solid #f87171', color: '#b91c1c', padding: '16px', borderRadius: '8px' }}>
          {error}
        </div>
      </div>
    );
  }

  return (
    <div style={{ height: '100vh', width: '100vw', paddingTop: '32px', paddingBottom: '32px', display: 'flex', flexDirection: 'column', gap: '32px' }}>
      <TopicInput
        onTopicSubmit={handleTopicSubmit}
        disabled={isLoading || !token}
      />

      {generatedScript && (
        <ScriptInput
          initialScript={JSON.stringify(generatedScript, null, 2)}
          onScriptSubmit={handleScriptSubmit}
          disabled={isLoading || !token}
        />
      )}

      {finalAudio && !isLoading && (
        <AudioPlayer audioFiles={finalAudio} />
      )}
    </div>
  );
};

export default App;
{{qq-border-end}}
Running the Podcast Generator App
Ready to see your creation come to life? Here's how to get everything up and running, follow these steps to start both the backend (Flask) and frontend servers:
1. Start the Backend (Flask)
{{qq-border-start}}
cd backend
flask run
{{qq-border-end}}
2.Start the Frontend
{{qq-border-start}}
cd frontend
npm run dev
{{qq-border-end}}
Common Challenges and Solutions
Here are some common challenges you might encounter and how you can tackle them like a pro:
1. CORS Issues
If you see CORS errors in your console, add this to your Flask app:
{{qq-border-start}}
# Middleware to handle CORS in all responses
@app.after_request
def after_request(response):
    response.headers.add('Access-Control-Allow-Origin', 'http://localhost:5173')  # Ensure correct frontend port
    response.headers.add('Access-Control-Allow-Headers', 'Content-Type,Authorization')
    response.headers.add('Access-Control-Allow-Methods', 'GET,PUT,POST,DELETE,OPTIONS')
    return response
{{qq-border-end}}
2. Token Expiration
Handle token expiration:
{{qq-border-start}}
const isTokenExpired = (expiryTime) => {
  return Date.now() >= expiryTime;
};

// Add this to your API service
const getValidToken = async () => {
  if (!token || isTokenExpired(tokenExpiry)) {
    const newTokenData = await apiService.getToken();
    return newTokenData.token;
  }
  return token;
};
{{qq-border-end}}
3. Audio Synchronization
For smooth playback of multiple audio files:
{{qq-border-start}}
export const playSequentially = async (audioUrls) => {
  const audioElements = audioUrls.map(url => new Audio(url));

  for (let i = 0; i < audioElements.length; i++) {
    await new Promise(resolve => {
      audioElements[i].onended = resolve;
      audioElements[i].play();
    });
  }
};
{{qq-border-end}}
If you’d rather do the audio stitching on the backend, you can refer to the example provided in Murf Cookbook.
Making Your Podcast Sound Natural
While NotebookLM excels at generating structured content from documents, our custom solution gives you fine-grained control over the audio output. The difference between a good podcast and a great one often lies in the natural flow of conversation. Here are some pro tips to make your generated podcasts sound more human:
1. Voice Selection
{{qq-border-start}}
{
  "conversation": [
    {
      "speaker": "Host",
      "voiceId": "en-US-natalie",
      "text": "Welcome to the show! [pause 1s] Today's topic is fascinating."
    }
  ]
}
{{qq-border-end}}
2. Adding Pauses
{{qq-border-start}}
{
  "conversation": [
    {
      "speaker": "Guest",
      "voiceId": "en-US-terrell",
      "text": "That's an excellent point! [pause 0.5s] And if we consider the implications..."
    }
  ]
}
{{qq-border-end}}
What’s next?
With the foundation of your podcast generator in place, there are several ways to expand its capabilities:
- Custom Voice Selection: Allow users to choose from different AI voices for a more personalized experience.
- Background Music & Sound Effects: Add support for background music and sound effects to enhance production quality.
- Real-Time Script Editing: Implement a built-in text editor so users can tweak their scripts before generating audio.
- Multi-Speaker Conversations: Improve the AI script generation to support dynamic, multi-speaker dialogues.
- User Authentication & Saved Projects: Introduce user accounts and saved projects to enable editing and future access.
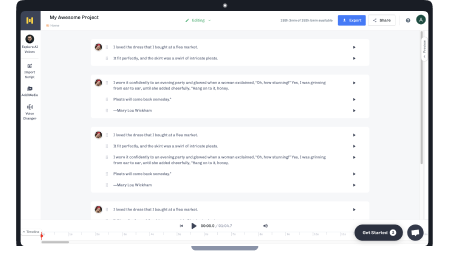
Watch it in action
Check out this quick demo to see how the final output looks.
Your Podcast Generator is ready!
If you followed the steps above correctly, you now have your very own NotebookLM alternative! In fact, you can go ahead and host it if you feel confident for others to give feedback. A lot of such open sourced alternatives to popular products have found immense community love over the years.
You can continue refining your project though consider adding advanced features for better user experience and integrating more customization options.
With Murf AI APIs, the possibilities with voice are endless.

.webp)