


Get in touch
Discover how we can improve your content production and help you save costs. A member of our team will reach out soon

Summarize the Blog using ChatGPT
In today’s digital age, where attention spans are shorter than ever eight seconds incorporating a video into your presentations can be a game-changer.
Did you know that a single minute of video is worth 1.8 million words?
That’s right videos can convey complex information quickly and effectively, making your PowerPoint presentations engaging but also more memorable.
Whether you’re looking to captivate your audience, illustrate a point more vividly, or add a dynamic element to your slides, embedding video can transform your presentation from mundane to magnificent.
In this blog, we’ll walk you through embedding a video in a PPT and talk about the advantages and best practices. Let’s dive in!

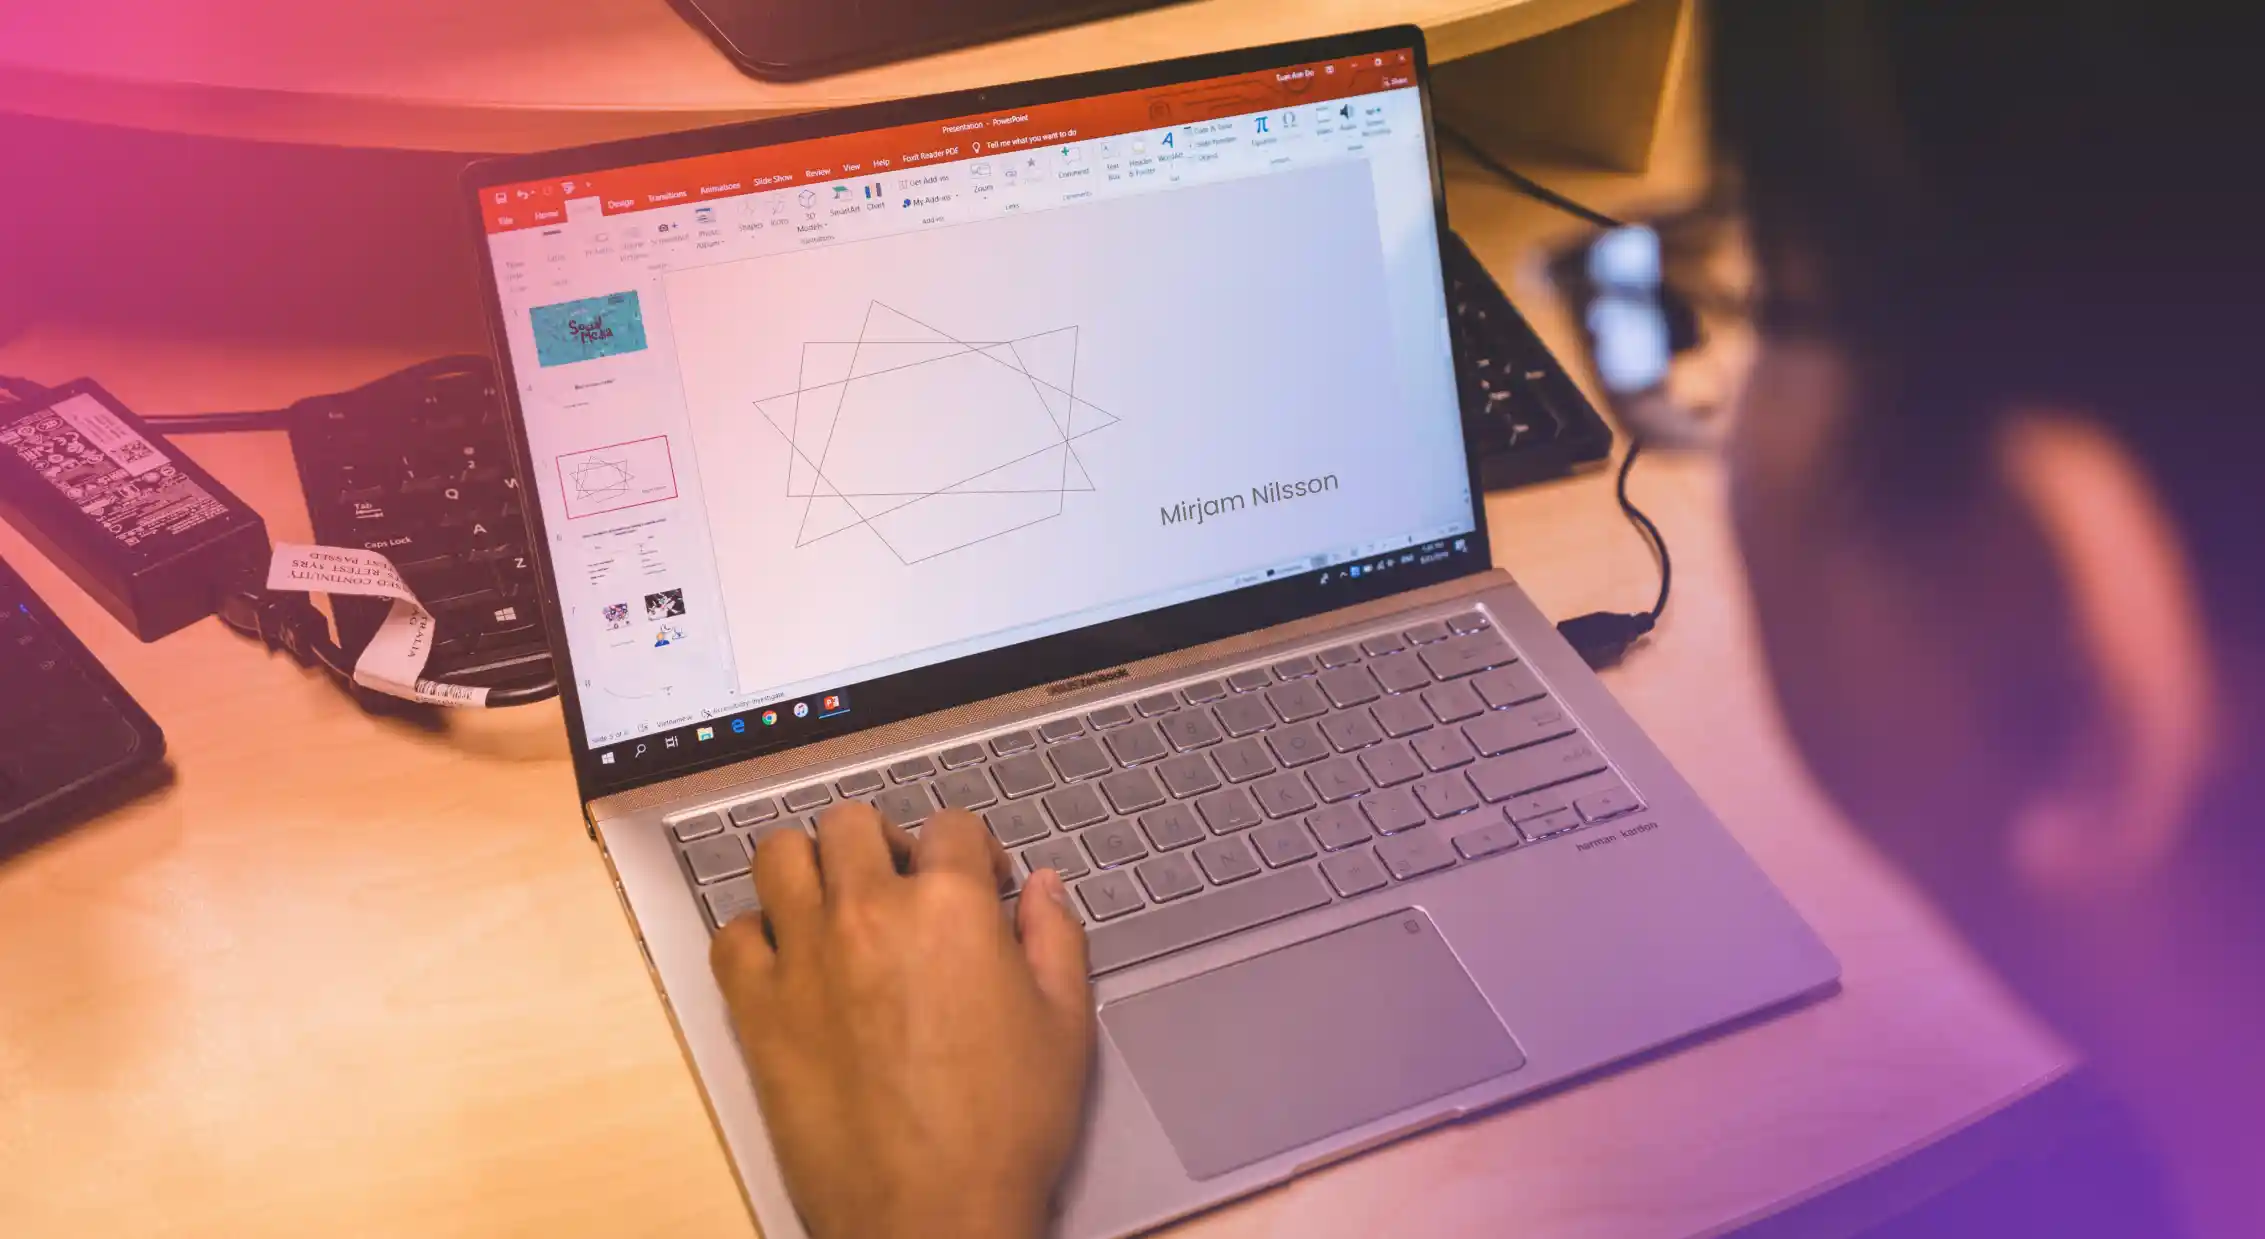
PowerPoint presentations are a staple in corporate and academic settings, but a static slide show can sometimes fall flat. Your audience craves dynamic content that grabs their attention and holds it from start to finish.
Videos do just that! They breathe life into your PPTs, changing them from mundane speeches into captivating experiences. Here’s how adding videos can transform your presentations:
Visual content is king. With 88% of professionals prioritizing it, adding videos to your presentations is necessary. They break the monotony of static slides, making your presentation more interactive and lively.
For instance, a PPT on environmental conservation might use a video display of a wildlife habitat with a voiceover to grab attention. This dynamic display turns a passive audience into an active one, keeping them hooked.
People retain 95% of a message they watch in a video compared to only 10% when reading it. Videos provide a visual and auditory learning experience that enhances information comprehension and retention. They can break down complex information that is difficult to explain with text and images alone into digestible chunks, making it easier for the audience to understand.
A video can deliver your message in seconds, keeping your presentation sharp and impactful. Instead of a lengthy explanation, insert a short clip reinforcing your point. This efficiency allows you to cover more ground, saving time.
Besides, embedding a video in PPT makes it a permanent part of your presentations. You can share or access it anytime, creating a reusable knowledge base perfect for consistent training and onboarding.
Most people prefer learning about products or services through video. Inserting videos in your PowerPoint slideshow meets this expectation, making your presentation look professional and well-curated. This attention to detail can impress your audience and enhance your credibility as a presenter.
Ready to turn these benefits into reality? Let’s explore the step-by-step process of incorporating a video into PowerPoint presentations.
Adding a video to your PowerPoint presentation is straightforward, regardless of the operating system you use. Choose from these two simple methods: inserting a video from an existing file or using a web link. Let’s walk through the steps:
Step 1: Fire up the PowerPoint App
Launch Microsoft PowerPoint from the ‘Start’ menu on your PC or the ‘Applications’ folder on your Mac.
Step 2: Select the desired slide
Open your PowerPoint presentation in the ‘Normal View.’ Choose the slide where you want to embed the video.
Step 3: Click on the ‘Insert’ tab
Click the ‘Insert’ button in the top menu bar to access options for adding various media types.
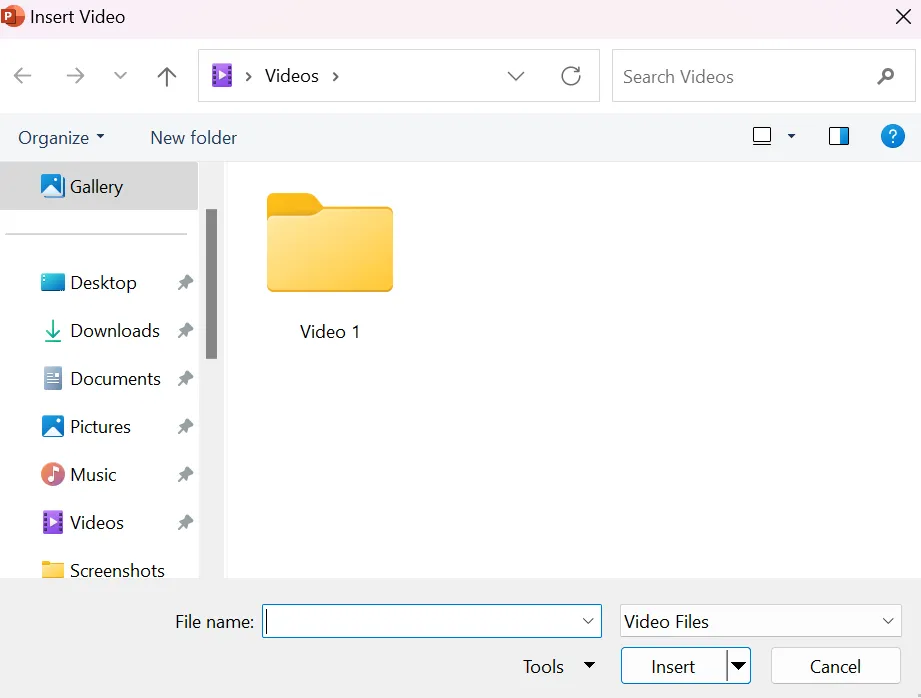
Step 4: Choose the desired video file
Select ‘Video on My PC’ (or ‘Video on My Mac’ if you’re using a Mac). Browse your computer to find and select the downloaded video file. Click the ‘Insert’ radio button on the bottom right of the dialog box or press ‘Enter’ to add the video.
What do you do if you want to insert a video from a web page or directly link a YouTube video? Follow these steps:
Step 1: Open your browser
Open the desired web page on your computer. Locate the YouTube video or any clip you want to embed. Then, copy the URL from the address bar.
Step 2: Go to the desired slide
In the PowerPoint presentation, navigate to the slide where you want to insert the video from the link. Then, click on the ‘Insert’ radio button in the top menu bar.
Step 3: Select Online Video
Click ‘Video’ and select ‘Online Video’ from the drop-down menu.
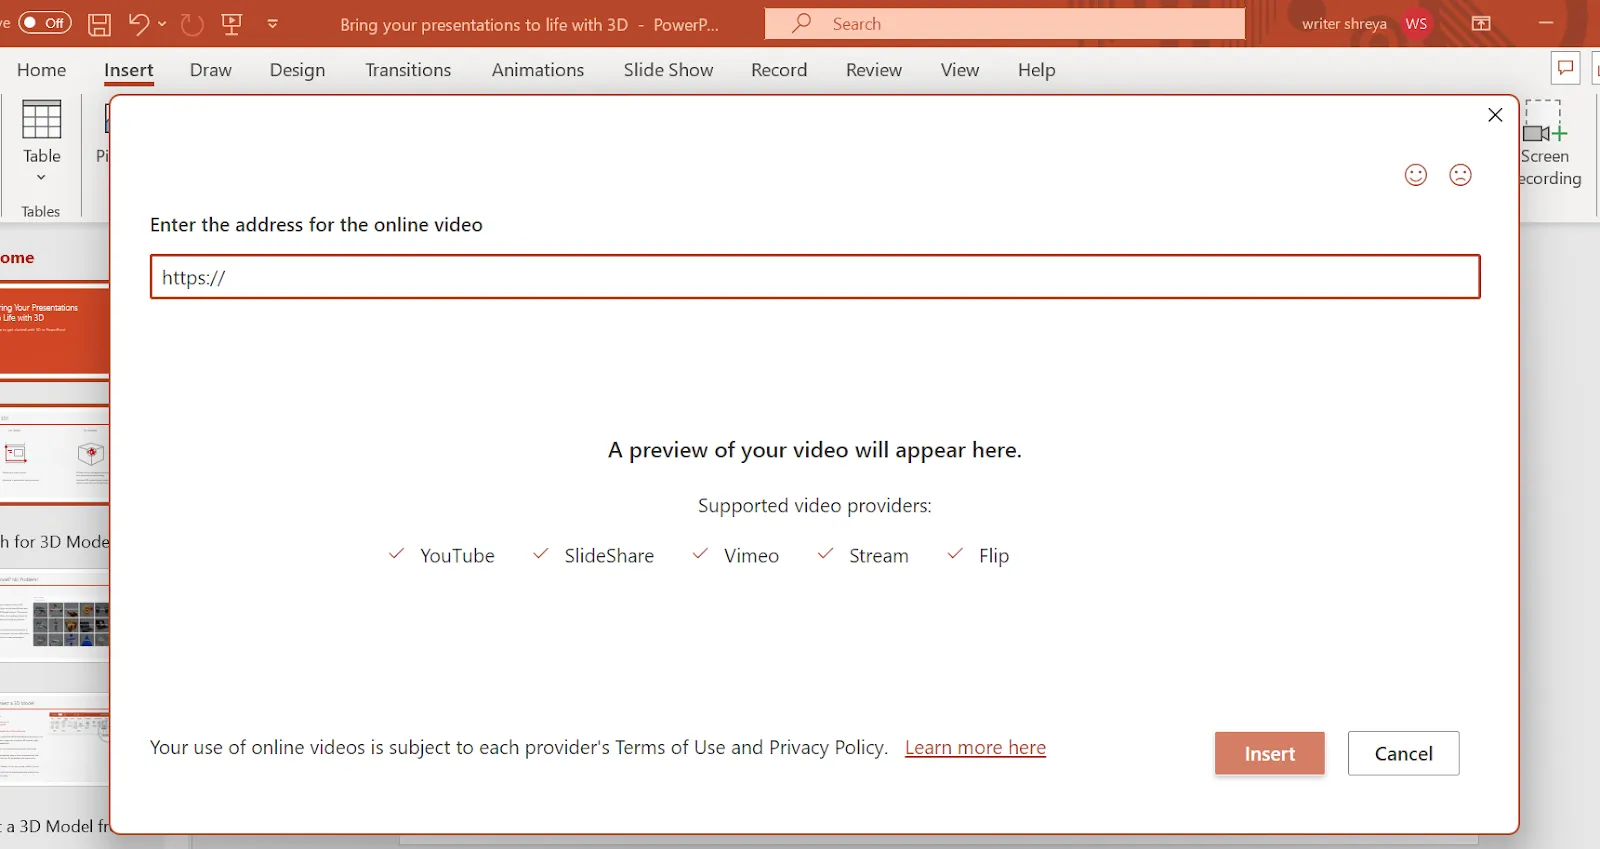
Step 4: Paste the video URL
Paste the URL of the online video, such as a YouTube video link, and select ‘Insert.’ PowerPoint will validate the link and insert the video into your slide, ready to stream during your presentation.
Embedding a video into your PowerPoint slide involves nine simple steps. Here’s a detailed guide to help you get it right:
Click on the PowerPoint icon from your desktop, taskbar, or start menu. Ensure you have the latest version for the best compatibility with multimedia elements.
Open the PowerPoint file where you want to embed the video. Create a new PowerPoint presentation if you don’t have an existing file ready.
Next, head to the specific slide where you want to insert the video. Use the navigation pane on the left side panel of the screen to select it.
Click on the main menu bar at the top of your PowerPoint window and then on the ‘Insert’ tab to open a new dialog box with options for inserting different elements into your presentation.

Within the ‘Insert’ tab, look for the ‘Video’ group. This dialog box contains different options for adding videos to your slide. Click on the ‘Video’ button. A drop-down menu will appear.

Choose ‘This Device’ to locate a desired video file on your computer (PC or Mac). If you prefer an online video, select ‘Online Video’ and paste the video link.
After selecting the video source, select ‘Insert’ to embed it into your PowerPoint presentation. The video will now appear on your slide.
Once the video is on your slide, adjust its size and position. Use the corner handles to resize the video and drag it to the desired location.
Click on the video to access playback options. Here, you can decide how to play the video during your presentation:

Go to ‘File’ in the top menu, then right-click ‘Save As’ to choose your save location and name your file.

PowerPoint supports a variety of video file formats. Knowing which formats are compatible can save you time and prevent playback issues. Check out this brief breakdown:
MPG and MPEG are excellent choices for inserting videos in PowerPoint. They deliver to-notch output with efficient compression, which is ideal for slide shows requiring sharp clips without large file sizes.
Top use cases:
SWF files support interactive content and animations, making them great for dynamic presentations. While less common today, they are still valid in older PowerPoint versions. Convert these files to a more supported format for better compatibility and security.
Top use cases:
WMV files offer high compatibility and seamless integration with PowerPoint. This format is beneficial if you use the Windows operating system because you don’t have to embed code or need additional software to run it on Windows.
Top use cases:
ASF and AVI are universal and widely supported formats. AVI is known for its high-quality video and audio, perfect for outstanding presentations. ASF is excellent for streaming content, ensuring continuous play from a web page.
Top use cases:
MP4 and its variations are the most popular video formats due to their compatibility across different devices. They offer excellent finesse and compression, ensuring your PowerPoint slideshow looks great without consuming much storage space.
Top use cases:
Use these supported video formats to create more dynamic and engaging PowerPoint slides. Seamless video integration will enhance your audience’s experience.
Imagine captivating your audience with a video presentation that is so engaging that it feels like a conversation. That’s the power of Murf Studio, an innovative tool that transforms your videos with professional-grade voiceovers.
Embedding these enriched videos into your presentations elevates the impact and effectiveness of your message. Here’s how Murf turns your videos into compelling stories, guiding your audience throughout:
Murf lets you customize every aspect of your voiceover pitch, speed, and pauses. This precise control ensures a seamless, engaging experience that enhances video content.
For example, you can slow the pace for complex information or add strategic pauses for emphasis, making your video more digestible and impactful.
Choose from 200+ natural, expressive voices that sound incredibly human-like. Murf offers voices across various accents, tones, and styles, ensuring you find the perfect match for your video.
Need an authoritative tone for a corporate presentation or a warm, friendly voice for a more casual meeting? Whatever your project demands, Murf has the perfect voice to bring your videos to life and set the right vibe.
Create voices in multiple languages to ensure your message resonates with global viewers. It is especially beneficial for international companies or educators who must communicate with a diverse audience. By providing voiceovers in multiple languages, you can make your video accessible and relatable to non-native speakers, expanding your reach and impact.
Embedding videos in PowerPoint can transform your presentations, making them more engaging, professional, and globally accessible. Using suitable file formats and Murf’s powerful features will boost your presentation’s impact.
Ready to elevate your presentations? Try Murf Studio today and create videos that captivate your audience from start to finish.

.svg)
It’s easy! Click on the video to select it, then use the handles around it to resize. Drag the video to your desired position on the slide.
No strict length limits exist, but longer videos can increase the size of your presentation file. It might cause performance issues, so keep your PPT concise and impactful.
Indeed! PowerPoint offers action buttons, so you can adjust the settings in the playback options to fit your presentation style.
Stick to widely supported formats like MP4. Test your presentation on various devices to ensure everything is flawless.
Yes, you can! In the playback settings, select the “Loop until stopped” option. Your video will keep playing until you decide to move on.
Upload your video to Murf, create the perfect voiceover with your desired settings, and export the final video. Then, follow the steps to embed this video in your PowerPoint presentation. Easy and effective!

Keeping your data safe


Learn how we help enterprises expand globally at scale


