How to Make a Voice Over Video with Murf

Voices help us connect with each other. It has been the most primitive and natural form of communication since the origin of speech about 500,000 BCE. Even today, researchers believe that we, as humans, encode our thoughts first in sound to process it. Did you just hear your voice saying this out loud in your mind?
Hence, it is not surprising that when we watch a video, our engagement and grasp on the story increases significantly if it has a voice over. There are of course some videos where storytellers do an amazing job of conveying emotions through just music, but in most other cases, video voice over is a great way to communicate effectively.
Let’s quickly take a look at an example of this adventure vehicle promo video with voice over:
If you are new to voice overs and are thinking how to make a voice over video, here is a really simple and affordable way to do this using Murf Studio.
Voice Over Video Maker
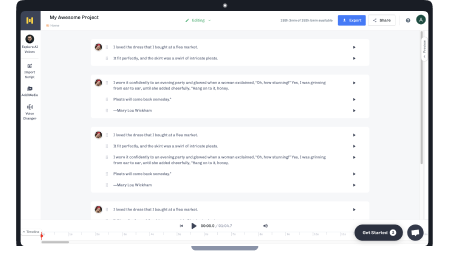
Murf Studio lets you create high-quality professional voiceovers for your videos in minutes. With Murf, you do not need any recording equipment or post-processing. All you need is a script. Murf can convert your script into natural sounding voiceovers in seconds and time it perfectly with your video clips. Need background music? You can add that, too.
Why Use Murf to Create Voice Over Videos?
Saves time and cost of recording
Murf enables you to create professional sounding voiceovers in minutes instead of hiring voice actors, renting studio space, or buying expensive recording equipment.
Making changes to the script was never this easy!
With recorded voiceovers, a change in the script means an expensive re-recording session and then post-processing. With Murf Studio, you don’t need to worry about script changes. Just edit your text and render. Your voiceover is updated in seconds and synced with the video, so you know how it works.
Only 100% human-sounding voices
Murf offers a wide range of realistic voices across various languages and accents. Each voice is tested for quality against dozens of parameters before it is made accessible in the Studio.
An all-in-one tool to create voice over videos
Murf lets you create voiceovers, adjust the timing of voiceover with video, and render, all in one place instead of relying on multiple third party tools. This makes the process really simple and fast.
Add free background music
That is not all! Murf gives you the choice to add all kinds of audio to your content. You can either add your own background score or upload from a collection of royalty-free music available in the Studio.
Free voice over video software
You can get started for free with Murf Studio. Choose from a range of hyper-realistic voices, create voiceovers, add background music, and render the voiceover along with the video, all for free.
How to Do a Voice Over Video?
Creating a voice over video with Murf is super easy and fast. Instead of paying a voice over artist to record for you or spending hours trying to record the perfect narration in your own voice, you can do it in minutes by simply entering your script and choosing from a wide range of versatile voices.
Let’s take a look at how to create voice over videos using Murf Studio.
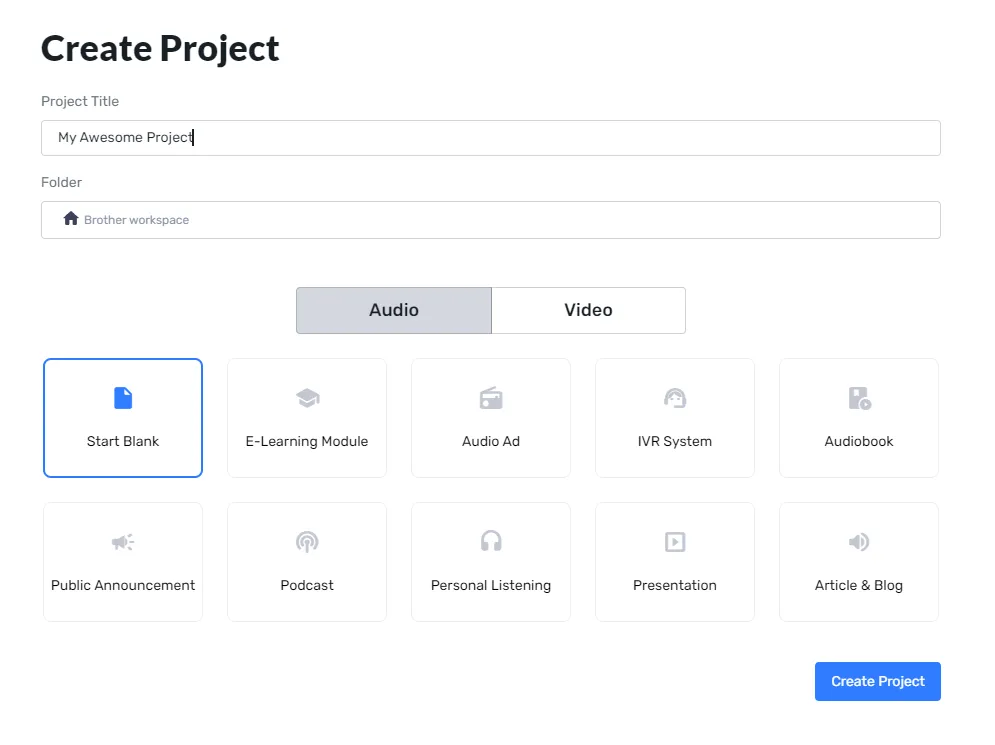
Step 1: Create a new project
Go to Murf Studio and create click on ‘create project.’ You will get a pop-up to choose the type of content. Select ‘video’ and choose the usecase.
Step 2: Upload your video
Click on ‘Add Media’ to upload your video to the Studio. You can either upload your own video or choose from Murf’s video stock library or import video from directly from platforms like YouTube, Vimeo, Dailymotion and more to the Studio.
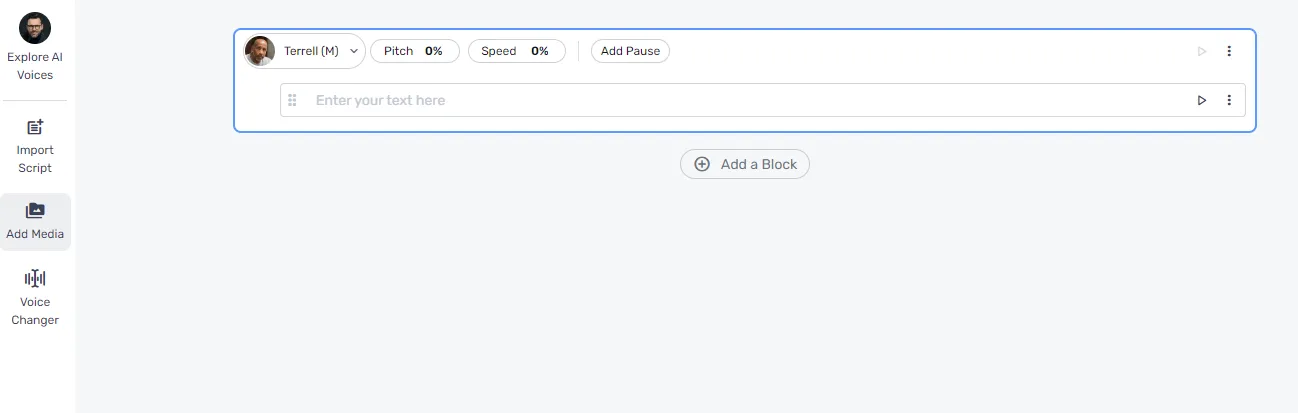
Step 3: Enter your script for the voiceover
Now it’s time to type your script in the text editor. If you have an existing script, you can simply copy paste the same into the text box.

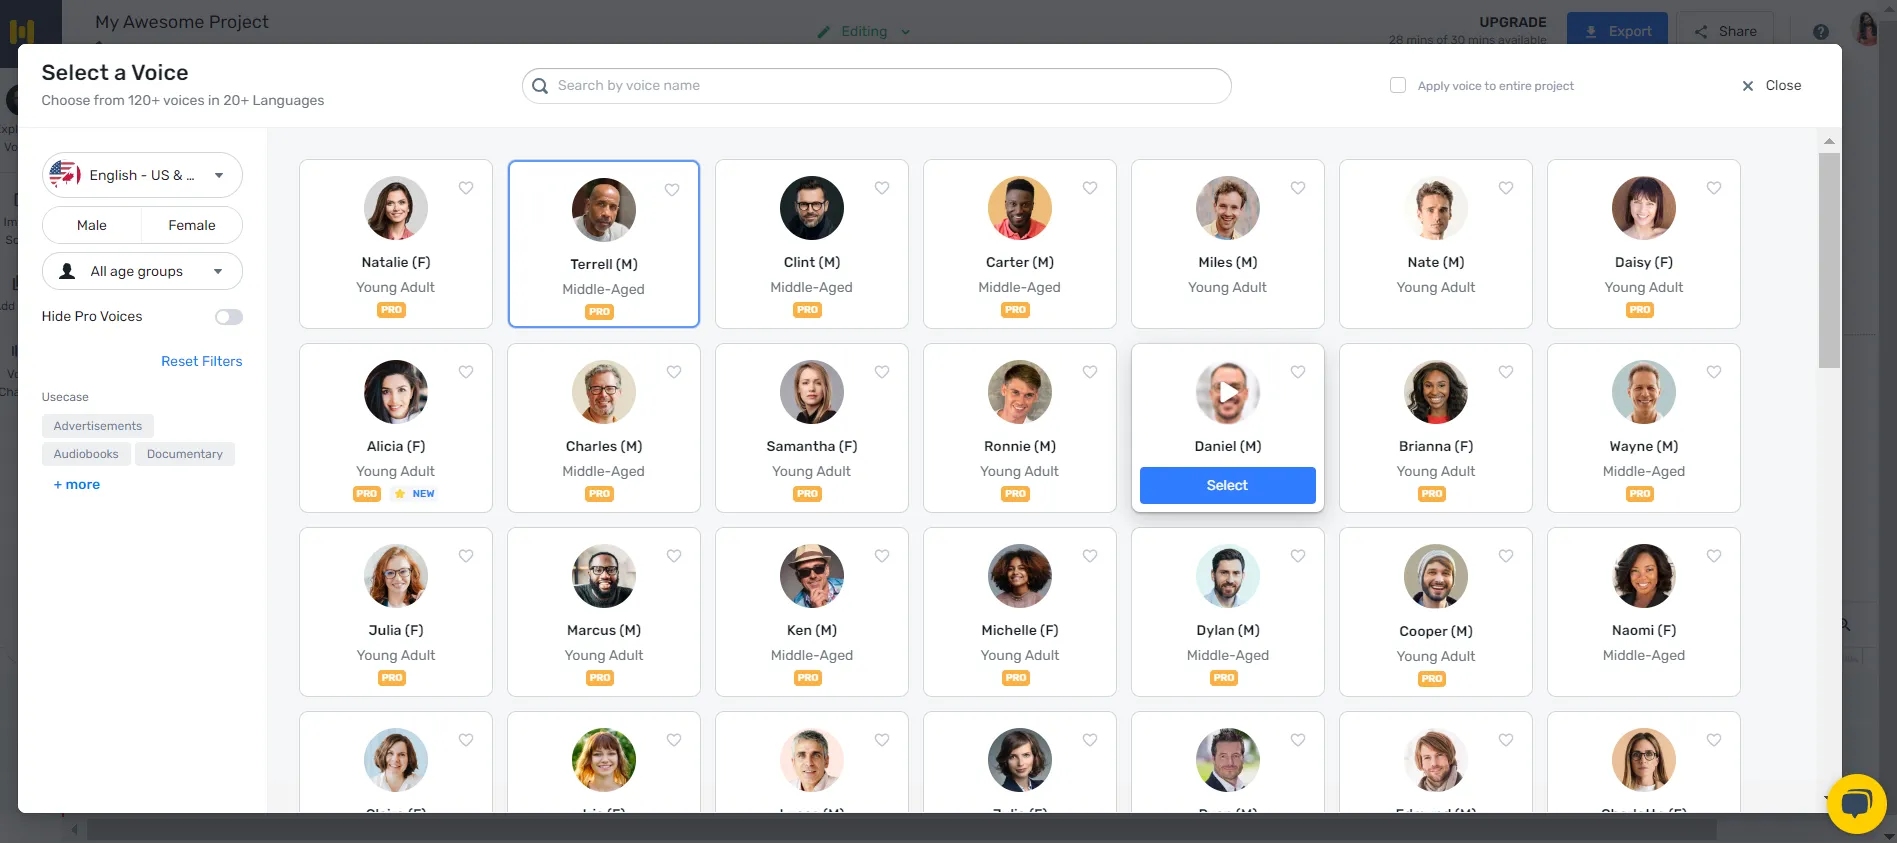
Step 4: Select voice and customization options
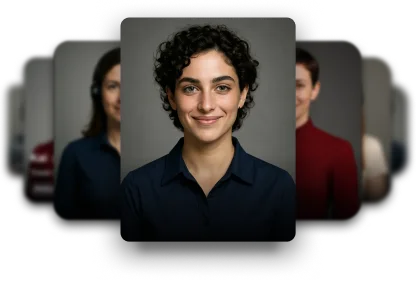
Click on the ‘Explore AI voices’ tab to choose and create AI voice for your video. Murf Studio offers a myriad of voices across age groups, tonalties, accents and languages including English, Chinese, Romanian, German, Spanish, Italian, and more. For example, Murf currently offers seven German TTS voices. You can play the voice samples for each voice from the menu as shown below to decide which one works for you.
After selecting the voice, you can use a number of voice customization options to cater to your script. All voices have customizations for:
- Speed
- Pitch
- Volume
- Emphasis
- Pronunciation

Add pause
To add pauses in different parts of the script, use the 'Add Pause' option and choose from the preset values or add your own custom value of pause.
Change speed
Murf Studio voices have a narration pace of 150-180 words/minute at normal speed. You can always adjust the pace of speech by increasing or decreasing the speed using the 'Speed' option on the top toolbar.
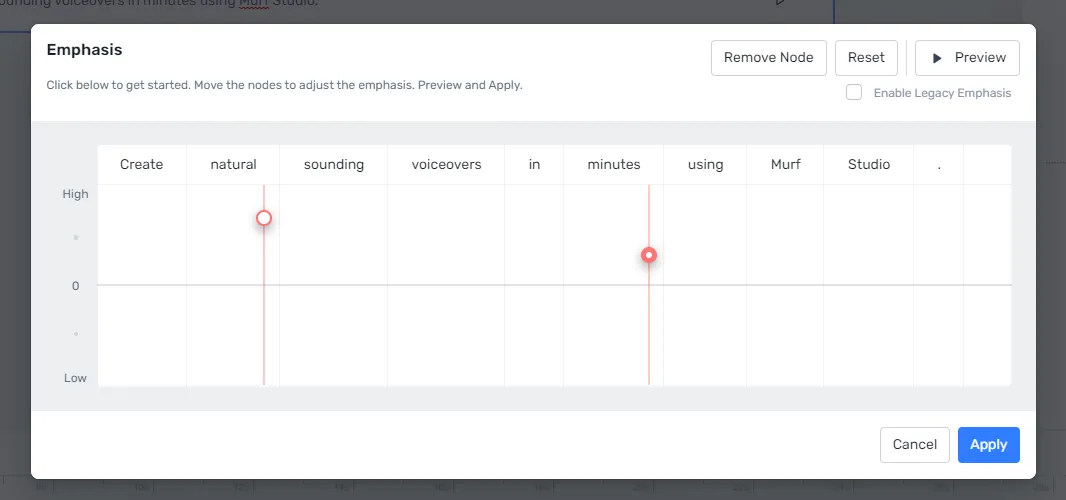
Modify the emphasis of certain words
One of the most interesting features supported by Murf voices is Emphasis. This feature helps you add emphasis where required while creating the voiceover. Let’s take a look at how the emphasis feature works.
To access the emphasis button, click on the bubble comment icon with a plus sign in the extreme right corner of the text block. This is the ‘Emphasis’ feature. You can add emphasis to specific parts of a sentence by clicking on the word/ words and changing the degree of emphasis of each node accordingly. Moving the node up ‘0’ in the graph adds emphasis by increasing the pitch of the selected word and moving the node below ‘0’ adds emphasis by decreasing the pitch.
Render your voiceover
After selecting the voice and styling options, you can preview to the voice over by clicking the play button next to each text block and then play the audio.
Step 5: Adjust timing of voice over with scenes in your video
For a professional quality video, it is important ensure the audio is well synced with the pace of the video. Pauses where needed, and even changes in speed of speech can go a long way to add this extra effect.
If you have multiple clips, you can adjust the length of the voiceover to match every clip so that each voiceover plays at the right time. Same process applies to background music as well.
Step 6: Build video and preview with voiceover
Once you are satisfied with the creation, click the play button on the middle of the screen to render the overall voiceover video. This stitches the video with voice over as per the timing selected in the bottom timeline.
Preview video and make changes as necessary:
- If you need to change timing, change the size of audio blocks in the bottom panel and Render video again.
- If you need some change in script, just enter the new text, render voice and then render video again.
How to Improve your Voice Over Quality on Murf
Here are our top tips on how to get the most out of Murf Studio to create professional quality voice overs:
1. Add modulations with voice styling options to make the voice over interesting
All voices in Murf Studio support pitch and speed customization, and have the option of adding emphasis. These come in handy when creating voice modulations and adding more depth to the narration.
2. Change spelling of proper nouns like names, places and more to improve pronunciation
Sometimes, you might find that the pronunciation of names and other proper nouns are not quite the way you'd like it to be. To fix this, you can change alternate spelling of such words to get to the correct pronunciation. Or you can also use IPA to arrive at the correct pronunciation. For example, Murf can also be spelt as Murph for the same pronunciation.
3. Add pause to provide breather and increase impact of your voice over
Sometimes a couple of seconds of pause introduced between two adjacent sentences in a video can significantly impact the delivery style and make it much more meaningful for the user. It is also a great way to provide breathers for users.
Conclusion
In this tutorial, we have explored the easiest way to add voice overs to videos in six simple steps using Murf Studio. With Murf, you have a range of choices when it comes to voices for different kinds of videos as well as styling options to keep your voices synced perfectly with your visuals. We hope you this tutorial helps you create amazing natural sounidng voice overs for your videos. Get ready to unleash your creativity!