Add Audio to Your Google Slides in Six Simple Steps

Did you know Google released an interesting feature in 2019 where users could enhance their presentation slides using audio?
A great addition if you ask us! Let’s say you have a last-minute presentation for your investors. Or maybe you want to pitch a creative idea and impress your potential client. No matter what your end needs are, using audio goes a long way!
You could add or generate compelling voiceovers like that of Charlie Chaplin selling your pitch or Steve Jobs and, mind you, audio can make the listener pay attention.
Long story short, with this new feature, you can add any kind of voice you want to your Google Slide. If you want to add audio files on Google Slides but don’t know where to begin, this handy guide is a great start. Let’s go!
Using Audio on Google Slides Presentation: The Basics
Before we look at how to add narration to Google Slides, let’s look at some key obligations:
- It is important to conduct a basic formatting of your audio playback by editing it for pace, volume, and more.
- It’s also essential to control the shadow, reflection, and volume of your audio playback file.
Additionally, note that Google Slides supports the following audio recording formats:
- MP3
- WAV
Now, let’s look at the most common way to add audio to your Google Slides:
Step 1: Open your Google Slides presentation and click the ‘Insert’ option. Then, click on ‘Audio’ under the drop-down menu.
Step 2: Select file upload to upload the audio clip you want to use in your Google Drive and select the file of choice.
That’s it. Google Slides will insert the audio file into your presentation; it is that easy!
How to Add Audio to Google Slides Using Murf
Now, let’s look at how you can create high-quality audio using Murf and then insert it into your Google Slides presentation using Murf’s Google Slides voice add-on.
Before you install the plug-in, have the audio you wish to use in the Slides ready. Alternatively, you can create an audio using Murf and then add it to the Google slides using Murf’s add-on (more on this later).
To add audio to Google Slides, follow these steps:
Step 1: Install the Murf Google Slides add-on from here.
Note: This add-on is free for all Murf subscribers, meaning you can seamlessly move from Google Slides to Murf Studio.
Step 2: Open an existing or new presentation in Google Slides.
Step 3: Switch on the add-on by navigating to the top toolbar and clicking the “Open Murf” option from the add-ons menu.
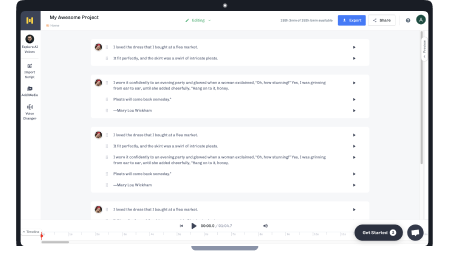
Step 4: Write and edit the voiceover script for each slide. This gives you complete control over the quality of the voiceover for your presentation.
Step 5: Select an AI voice for your narration from Murf’s vast repository of natural-sounding AI voices.
Step 6: Click the “Build Video” option to create the voiceover presentation.
Pro Tip: Murf also allows you to automatically sync the narration to your presentation with its automated time syncing functionality. So, attribute the right time to your slide to ensure it doesn’t feel long-drawn or too short.
When adding audio to Google Slides, be mindful of the following considerations:
- File Size: Large audio files affect your presentation’s loading and playback performance. Keep the file size reasonable at all costs.
- Compatibility: Ensure that the audio format you choose is widely supported. Remember, MP3 is generally a safe choice as it is universally compatible.
- Editing: While Google Slides allows you to insert audio files, the editing capabilities are somewhat limited compared to a dedicated audio editing software. So, you must edit your audio files before adding them to your presentation.
Try Murf for Creating Professional, Engaging Audio Files
Adding audio on Google Slides can elevate your presentations in more ways than one. You can improve the overall impact of your message by incorporating high-quality audio.
You can use narration to guide your audience through complex concepts. Alternatively, you can add sound effects and background music to Google Slides to set the right ‘mood.’ Audio can enhance your presentation’s engagement and comprehension when used strategically.
With Murf, you can effortlessly transform text into lifelike, studio-quality voiceovers to keep your listeners coming back for more.
Adding professional-grade audio for your Google Slides presentations has never been this easy. Express yourself right with Murf’s natural-sounding AI voices that stand out in the age of TikToks, YouTube Shorts, and more.

Frequently Asked Questions
Can any type of audio be added to Google Slides?
.svg)
Generally speaking, consider adding only WAV file or MP3 audio for your Google Slides, as these are universally accepted extensions.
How do I upload audio files to Google Slides?
.svg)
To upload audio on Google Slides, start by opening a presentation in Google Slides. Then, choose the slide you want to add the audio file and click the “Insert Audio” option.
Next, select the audio file you want to insert into your presentation from your computer or Google Drive. Once your audio is on the Google Slide, simply adjust the Audio icon to synchronize it with your presentation.
That’s it; you are done.
What are the limitations of adding audio to Google Slides?
.svg)
The biggest limitation is that Google Slides only supports specific audio file formats, such as MP3 and WAV files.
How can Murf enhance the audio added to my Google Slides?
.svg)
Murf has rolled out a feature, Google Slides Voice Add-on, which allows you to easily add voice overs to Google Slides. You can write and edit voiceover scripts and select from various AI voices to add a compelling narration to your presentation.
Is it possible to add voiceovers to Google Slides using Murf?
.svg)
Yes, you can. All you need to do is leverage your Google account linked to Murf to build engaging voiceover presentations.
Can I add background music to my entire Google Slides presentation?
.svg)
To add background music to your entire Google Slides presentation, click the Insert → Audio option to start. You can then upload a desired audio file from your Google Drive.
How do I ensure my audio plays during a Google Slides presentation?
.svg)
To ensure your audio is playing accurately within your Google Slides presentation, insert the audio of your choice from your Google Drive into the production.
Then select the upload option and click the speaker icon on your chosen slide. Next, click the speaker icon to play your audio and see if it works perfectly.
What are some creative ways to use audio in Google Slides?
.svg)
Some of the most creative ways of using audio in Google Slides include:
- Recording an audio reflection
- Recording narration for your live presentations
- Adding background music to set the right tone and mood.
- Recording an audio podcast
- Using historical audio speech
- Creating an audio-driven interactive slide
And more!
How can I edit or change the audio once it’s been added to Google Slides?
.svg)
To edit or change the audio that has been added to the Google Slides, follow these steps:
Step 1: Start by selecting the ‘Audio’ icon.
Step 2: Navigate to the toolbar and click the ‘Format’ options.
Note: You can also right-click to view the loudspeaker icon. From there, you’ll see the ‘Format’ option. Click on ‘Format’ to make the required changes.
Are there any copyright considerations when adding audio to Google Slides?
.svg)
Sometimes, people may have problems playing the audio file within your Google Slide and need additional permission. To avoid this, you must ensure you have set the right permissions for the audio file before sending it to others.


.webp)


.webp)
.webp)


