Set up Falcon 2 TTS Server
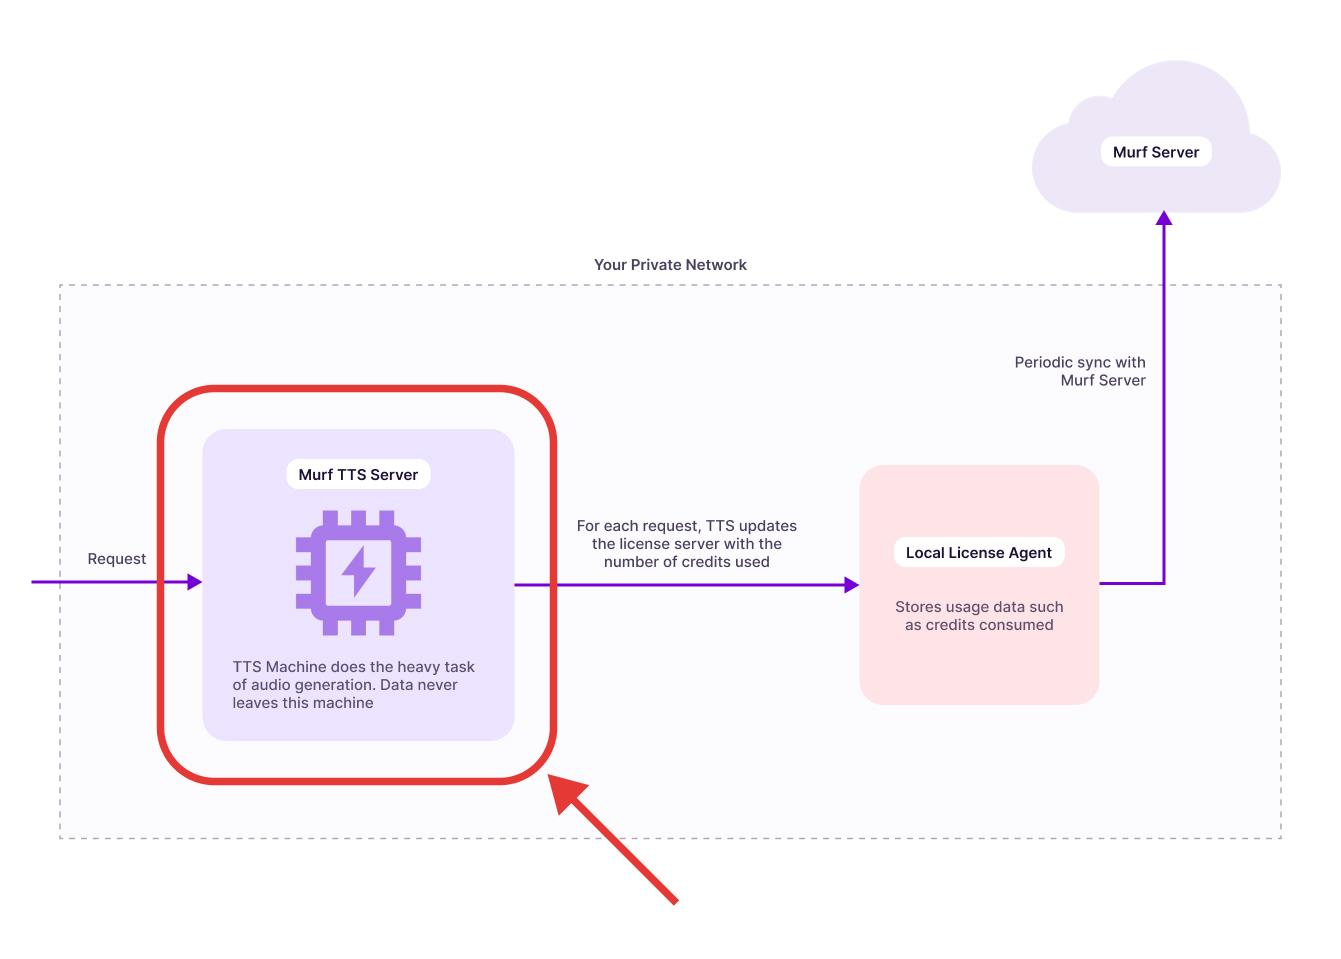
The Falcon 2 TTS Server is the core engine of Murf’s on-prem text-to-speech system. It processes text input and generates speech locally, delivering fast, high-quality output without relying on external APIs. Running Falcon 2 within your own infrastructure ensures low-latency performance, data privacy, and full operational control.
Trial Deployment
This guide provides step-by-step instructions for deploying the Murf TTS (Text-to-Speech) service on an AWS EC2 instance using Docker with GPU acceleration.
Prerequisites
Hardware Requirements
Minimum Requirements
Recommended Requirements
Software Requirements
Operating System
- Ubuntu 22.04 LTS (recommended)
- Amazon Linux 2023 (supported)
Required Software
- Docker Engine (20.10.0 or later)
- NVIDIA Container Toolkit (nvidia-docker2)
- NVIDIA GPU Drivers (version 525.60.13 or later)
- AWS CLI (configured with appropriate IAM permissions)
Pre-deployment Checklist
NVIDIA GPU Drivers Installation
Check if drivers are already installed:
If you see GPU information displayed, drivers are already installed and you can skip to step 3.
If drivers are NOT installed, install them:
Option A: Using Ubuntu Repository (Recommended for Ubuntu 22.04)
After reboot, verify installation:
Option B: Using NVIDIA Official Repository
Run nvidia-smi to verify the installation.
AWS GPU instances launched with Deep Learning AMIs or GPU-optimized AMIs usually have drivers pre-installed.
Docker Installation
Install Docker if not already installed:
Nvidia Container Toolkit Installation
Verify GPU Access
Test that Docker can access the GPU:
You should see your GPU listed with driver information.
Get the Docker Image
Murf team will provide you with the Docker image for the Falcon 2 TTS Server. You will be provided with a docker pull command to pull the image.
Deployment Steps
Set Environment Variables
Create environment variables for your deployment:
Important: Replace your-secure-secret-key-here with your actual production secret key.
Run the Docker Container
Run the Docker container with GPU support:
Command breakdown:
-d: Run in detached mode (background)--gpus all: Enable access to all available GPUs-e TTS_MASTER_SECRET: Pass the master secret for authentication-e LLA_ENDPOINT: (Optional) Specify custom LLA server endpoint--name murf-tts: Name the container “murf-tts”-p 80:8000: Map host port 80 to container port 8000--restart unless-stopped: Automatically restart container unless manually stoppedLast parameter: Docker image URI
Verification
Check the Container Logs
Monitor the startup logs to ensure the service initializes correctly:
This should show the startup logs and the service should be ready to use.
Test the TTS Service
Option 1: Health Check via Browser Open your browser and navigate to:
You should see:
Option 2: Interactive Audio Test Page Navigate to the test page:
This provides a web interface to:
- Paste JSON payloads
- Generate speech
- Play audio directly in the browser
- Download WAV files
Option 3: API Documentation
View the interactive API documentation:
This opens the FastAPI Swagger UI for exploring all available endpoints.